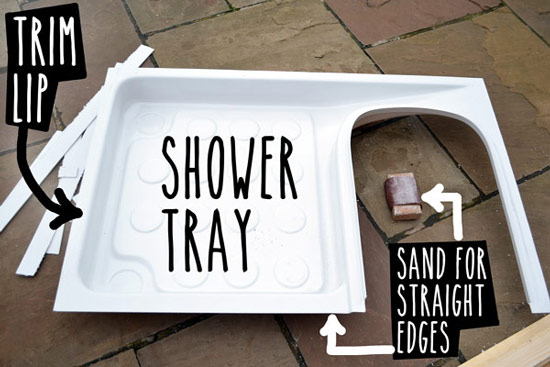
I bought this shower tray from a local caravan fitting shop (picture below). The shower tray has a recessed cut out to fit the type of cassette toilet I’ll be using (the Thetford c200) and measures around 1025mm by 670mm, but it can be trimmed to a slightly smaller size.

These shower trays do not come with any documentation or instructions and so the method of installation I’m about to show you is my way of doing it. The main thing is to put plenty of support underneath the raised part of the tray (in the middle) to minimize flexing and potential cracking.
1. Cut shower tray to size
I wanted to make the shower room as small as possible so I cut the lip around the shower down to the smallest size I thought I could get away with, leaving around 3-4cm left of the lip. I cut this very slowly using a jigsaw and a very fine blade–a course blade will snag and crack the plastic. It’s also important to keep moving with the jigsaw at a consistent speed otherwise the heat from the friction can start to melt the plastic. I used a bit of WD-40 on the blade to minimise friction and stop the blade snagging.
2. Cut drain hole
There are two blank spots provided on the far side of the shower tray. I sat the tray in the position I wanted it (the back corner of the van) and checked the van floor underneath each blank plate for the drain. Underneath one was a main chassis member, and under the other was a blank floor panel, so this is the one I used for the drain hole.
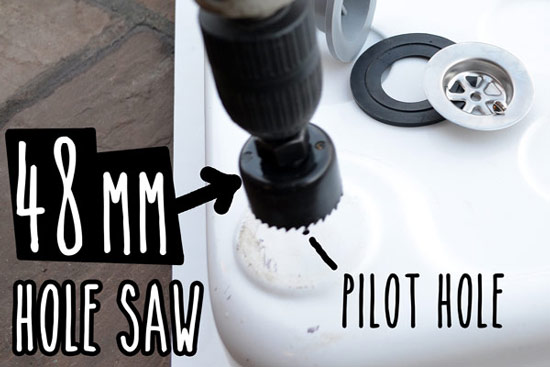
I bought the drain attachment along with the shower tray. They come in two versions: straight or right angle to fit 28.5mm push fit hose. I’m using a straight one.
To get this hole right in the centre of the drain blank plate, it helps to cut a pilot hole first.
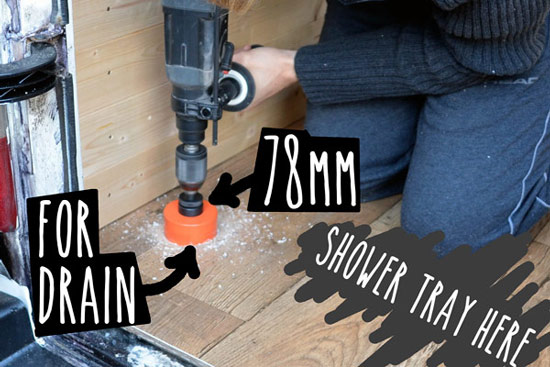
With the hole cut in the shower tray, the floor of the van needs to marked and cut for the drain to go through. This hole needs to be wide enough to accommodate the whole width of the drain (including the lip) so the shower tray sits flat on the floor of the van. I used a 76mm hole saw for this.
The image below shows how the drain attachment is fitted to the shower tray–the metal grill goes on top of the tray and the rubber goes underneath. I recommend fixing the drain attachment to the shower tray at the last minute, when the tray is ready to go in, otherwise the tray could easily get damaged if it falls or the drain gets caught on something.

3. Build frame for shower tray
I built a frame using four lengths of 22x47mm pine to fit around the underside of the shower tray lip. This will be to give support for the shower tray and also to give a good straight edge for which the enclosure walls can be built up from. To make this perfectly square, I cut some right angle pieces (using a set square) of thin plywood to use for the corners–but only on one side otherwise the surface would not be flat for the lip to sit on.

I glued the frame to shower tray, using PU adhesive and held it in place with masking tape. Once it had set I sanded the edges to make the plastic lip of the shower tray flush with the wooden frame. This edge must be straight to give a good edge for the enclosure frame and walls to sit against–you’ll see this in the next part about building the enclosure stud wall.


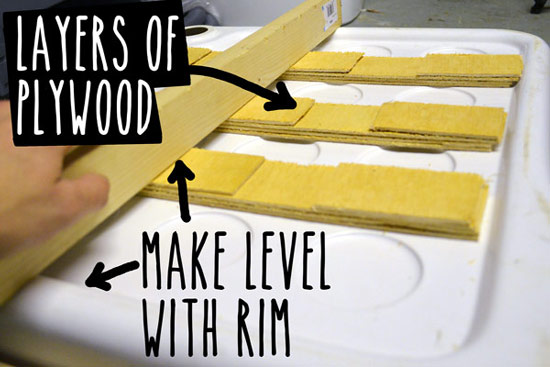
4. Support underneath of tray
Only the outer rim of the shower tray sits on the floor. The whole of the middle (where you stand) is raised and needs to be supported from underneath. I cut strips of thin plywood and stuck them to the bottom of the shower tray with PU adhesive, layering them up until they were level with the rim of the tray. I did this until I covered the whole area.
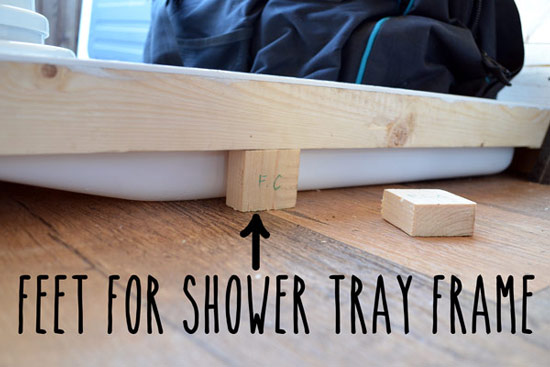
5. Cut feet to support frame
The frame sits on eight feet, cut from blocks of wood, at each corner and centre. It was important for the exact size of each wooden block to be measured with the shower tray in its exact position to make sure it was properly supported all round, on my uneven floor. I labelled all the blocks and then took the tray out to screw them into place, on to the frame.
6. Fit into place
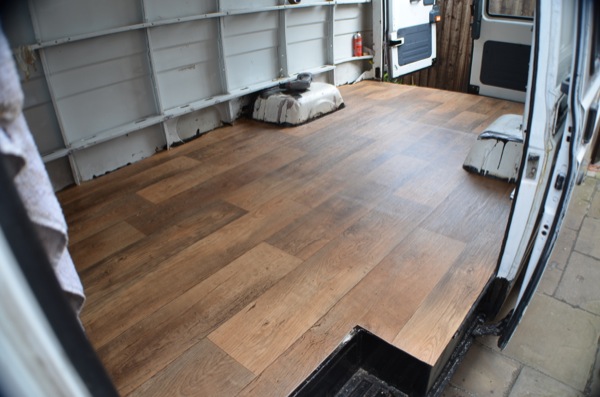
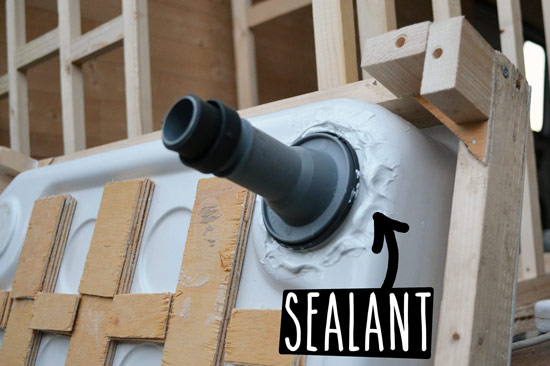
The shower tray is glued to the floor with a dab of PU adhesive in each corner. This is just enough to stop it slipping around for when the enclosure gets built. I also put some of the same glue to seal around the drain attachment to since It will be exposed to the outside. Once the tray was in place I went under the van and filled gap around the drain with more glue.
Now see post on building the shower enclosure.
Hopefully this helps anyone wishing to install a shower tray in a van…. Or specifically this Thetford cassette toilet tray