

The van needed some welding doing. It always did need welding doing but the holes were covered with fibreglass. But fibreglass doesn’t last very long.
I took the van to my friend Matt’s workshop – you know him from the blog and travels. He fixes up old cars and makes things like mini-moto snowmobiles, solar powered trikes and hydrogen fuel cells – in his kitchen. He’s recently taught himself to weld.
In this post I’ll go through what we (well, Matt) did to fix up the wheel arch rust holes on my van.

Here’s how it was done in 13 steps. The pictures and steps below will alternate between the left wheel arch and the right wheel arch – it was the same job on each side.
1. Cut out bad rust
The rust should be cut back until there is enough good metal to weld to. Any rust that has penetrated all the way through the metal should get cut out.

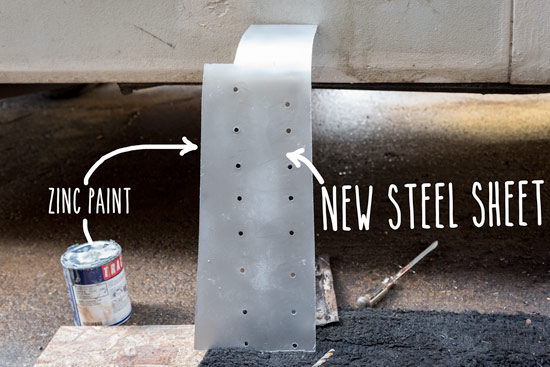
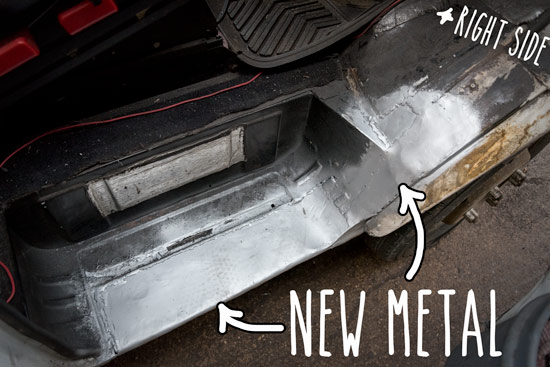
2. Cut new sheet metal
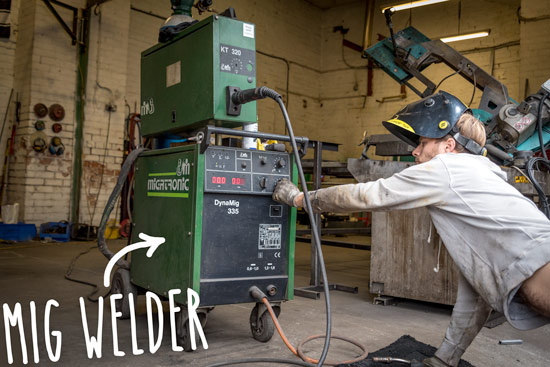
3. Set up the welder
This is a MIG (metal inert gas) welder – a high DC current sent through a consumable electrode that’s shielded with argon gas. The battery of the van has to be disconnected first. Matt adjusted ampage a few times until he got a good weld.
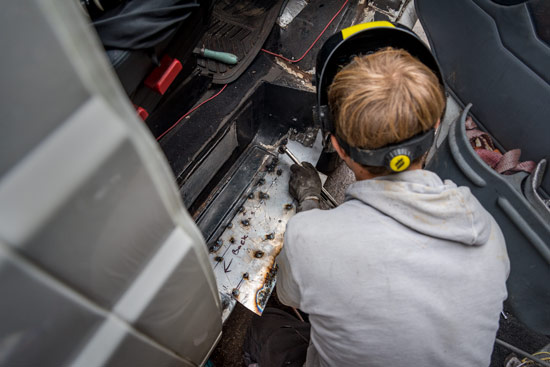
4. Weld
Matt spot welded around the new metal sheet and then went round and welded in between
5. Grind back the welds
Using a 80grit flap disk on the angle grinder matt took off the high areas of the welds and just smoothed it out. This thing can take a lot of metal off if you’re not careful, but can really neaten things up a lot and make the panels pretty much flush.

6. Here’s the right step and wheel arch
It was sprayed with zinc straight away to prevent rusting
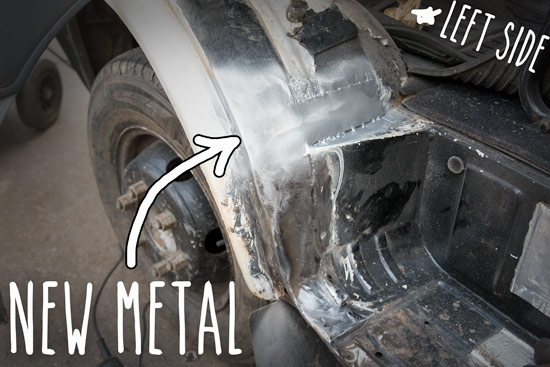
6B. And here’s the Left step and wheel arch
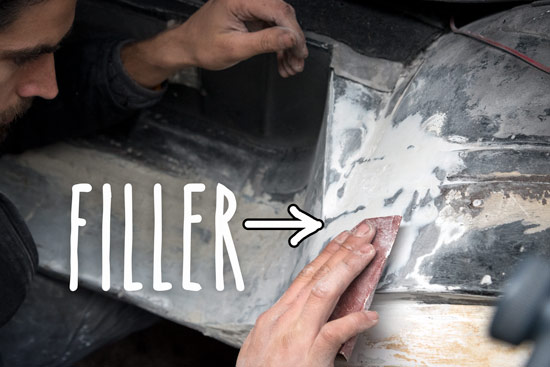
7. Fill for a good surface
This might not be essential but paint does seem to last longer on smooth surfaces and rust usually attacks the edges first where the paint often wears off and gets chipped. I did the right side with body filler and the left side with fibreglass filler – I want to see which one lasts the longest, if any.
8. Prime and Paint
I used a zinc primer, sanding back lightly before applying a thick double slapping of black paint.

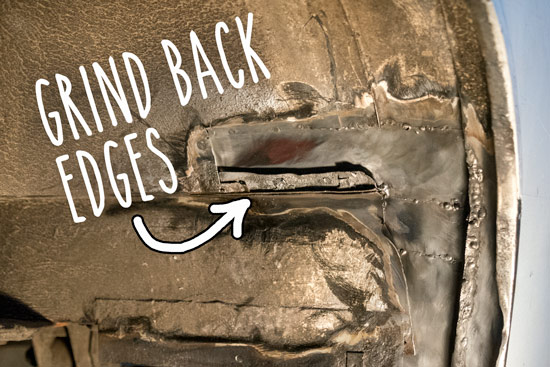
9. Now finish the underside – inside the wheel arch
These new seems, where the new metal meets the old, need to be sealed and protected well otherwise water could easily get in and get trapped, quickly causing rust again.

10. Grind back edges
I ground back the edges to prepare for primer and sealer, below.
11. Zinc paint (primer)

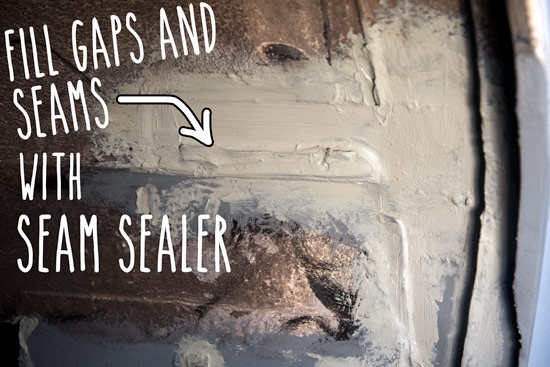
12. Seal with seam sealer
This is like a flexible sealant that can be painted over. I slapped a load on with a brush making sure I pushed it right into all the gaps.
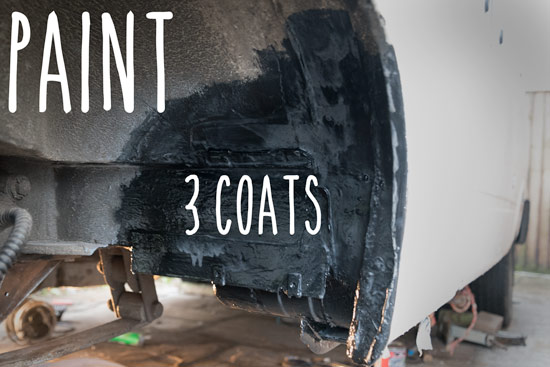
13. Paint and underseal
I painted with 3 coats of paint and top coat of undersealer in the high impact areas of the wheel arch.
So that’s it. Is this how it’s meant to be done? who knows. As long as it’s watertight and it lasts then I’m happy. I’ll keep an eye on these areas over the next few weeks.