

I got the idea of this expandable bed from the deep red motorhome website but this is my version that I made it up as I went along.
Check out the finished van! and if you want to see how the bed is pulled out, you can see me doing it at the end of my ‘day in a van video’.
Bed overview
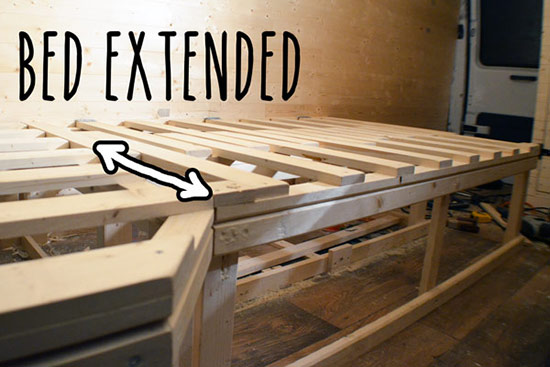
The end part is just like a bench with a lid–it doesn’t move. The main part is the bit that slides out. These two parts are separate structures and both have hinged lids that can be opened up to access the space underneath for storage.


Building the end part of the bed
The end part is the simple bit of the sofa bed. It’s just a box with a lid. And so I built this first to give me a bit of practice for the main part, which I’ll show you after this.
1. Build frame
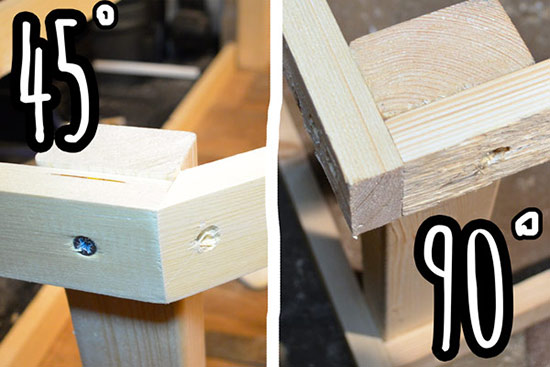
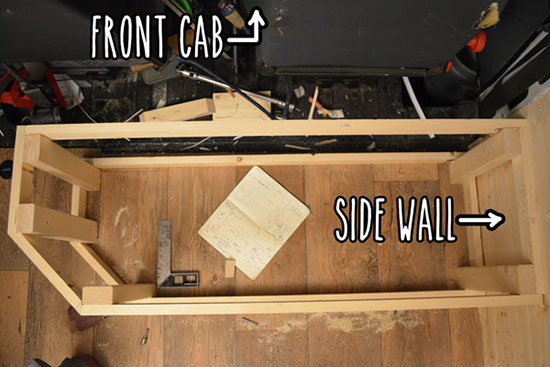
The frame is built around 5 strong pine legs–one in each corner. All the joints are just simple square butt joints like all the other things I’ve made. The wood needs to be cut perfectly straight to make good strong joins–I used a box guide and a handsaw for this. I made one of the corners to be a 45° angle because a square corner would get in the way a little bit when you walk into the van through the side door.
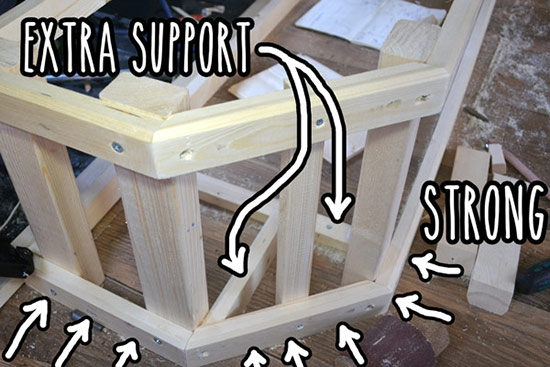
2. Fix to floor and strengthen
The frame has to be pretty strong around the bottom because it will probably get kicked and knocked quite a bit. I put in some extra supports that are fixed to the plywood floor with screws. You can kick this pretty hard. It’s solid.
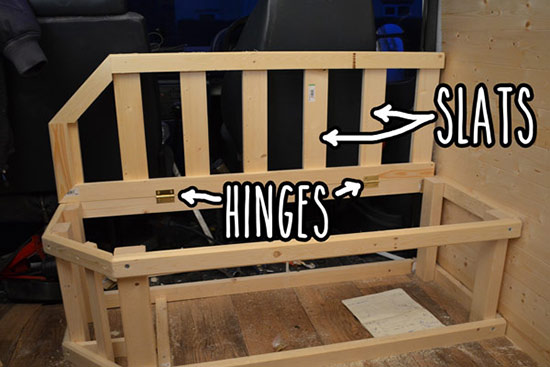
3. Hinged lid
The hinged lid is for access to the electrical stuff that will be inside–I’ll show you this in the electrical system chapter. The lid is made from wooden slats (like the main part of the bed) at intervals of 10cm and is attached to the bench frame with a couple of cabinet hinges.
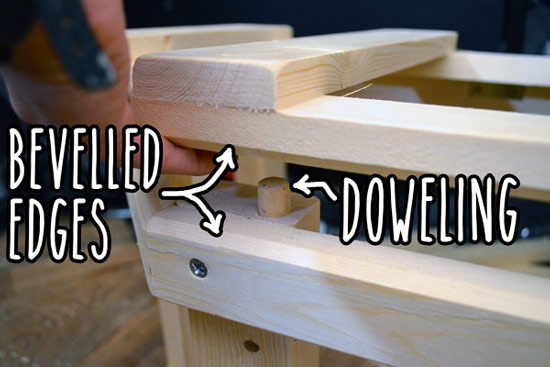
I fitted a piece of doweling at each corner that the lid closes down onto. This gives extra strength to the whole frame when the lid is closed. I also bevelled the facing edges of lid and the frame to you help you get your fingers in when lifting the lid.
Building the main (extending) part of the bed
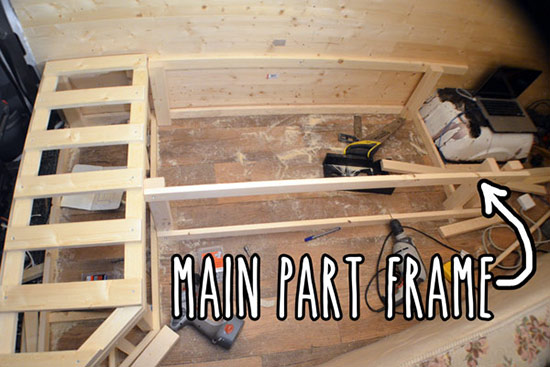
1. Frame
The frame for the main part of the bed was built in the same way as for the end part–quick, simple and strong–no fancy joining techniques. I fixed the back of the frame to the cladding wall and also fixed it to the floor just like I did with the end part
2. Hinged lid
I fitted a hinged lid made up of slats. Up to now this is just the same as the end part–a frame with a lid that hinges up to access the inside. The gap between the slats needs to be big enough to fit the extension slats in between. The gap between mine is about 11cm. You may want a smaller gap depending on how firm your foam or cushions are that will sit on top. I’ll be using quite firm and deep cushions (15cm) from a caravan and so the gap of 11cm between the slats is unnoticeable.

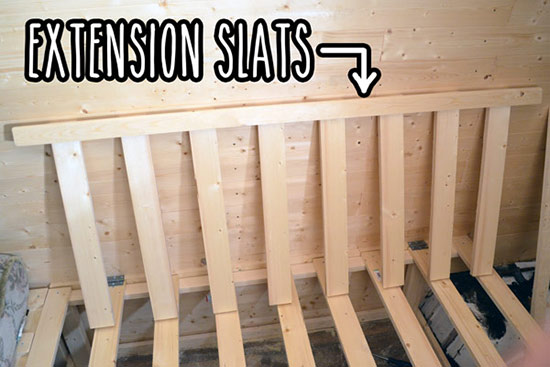
3. Extension slats
I fixed the extension slats at right angles to a length of wood, spaced so they sit flat in between the static slats. This is the part that will slide out.
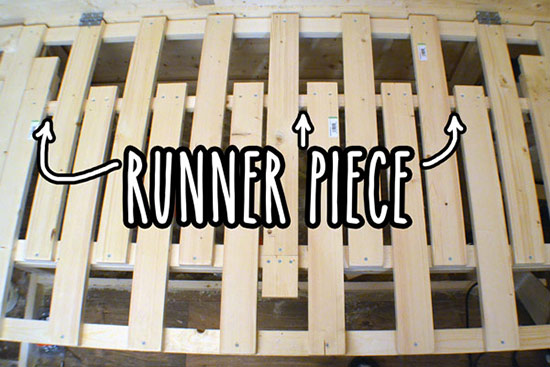
4. Extension runner
At the moment the extending slats will just flap up and down and have no support. To stop this I fixed each extending slat to a runner piece that sits underneath the static slats. The runner piece is going horizontal across the picture, at right angles to the slats. The runner sits in a guide at each end of the bed frame so the extending slats are only able to slide on a horizontal plane. I sanded this runner piece, and also the guides, to a smooth finish and then rubbed on some candle wax to make it run smooth.

5. Lips
The extending part needs to lock into the static part so it can all be lifted up as one lid. This was something I missed, so I went back and made a modification.
I extended one of the static slats (the middle one) so that there is a lip for the extending part to slot under when pushed all the way in. I curved the underside of the lip so it easy slides over the extending part. I also did this for the outer two extending slats so that they slide over the top of the static frame that sits against the wall. The whole thing now lifts up on the hinges. The image below shows the lip.

6. Extension leg
This will be support for the extended part to sit on when extended. I basically just replicated the front part of the main bed frame–a rectangle with a leg at each end. This whole front leg will be move out with the extending part.
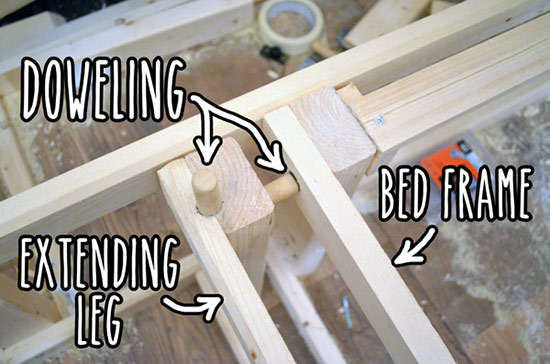
The tricky part was that I wanted the lid to lift up without taking the extending legs with it. I used wooden doweling fitted vertically on the top of the extending legs so that the lid detaches when lifted. There’s also another doweling piece, horizontally fitted to each extending leg so that the extension part slots securely back into the main frame. shows how the hole in the lid fits onto the doweling of the extension leg.

Finishing the sofa bed
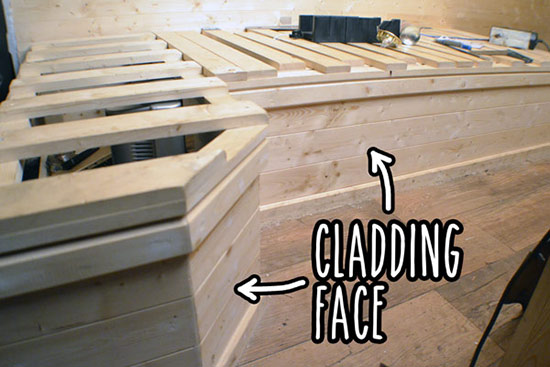
1. Cladding the face
I fitted the whole front of the sofa bed frame with the same cladding that I’ve used throughout the van. It makes the bed structure look nice and solid.
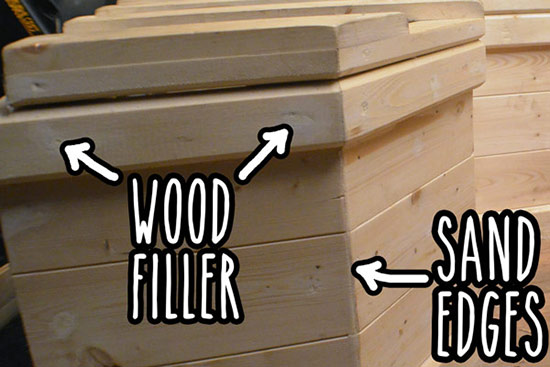
2. Fill screw holes and sand edges
I used wood filler to fill all of the screw holes and sanded it back with 320-grit sandpaper.
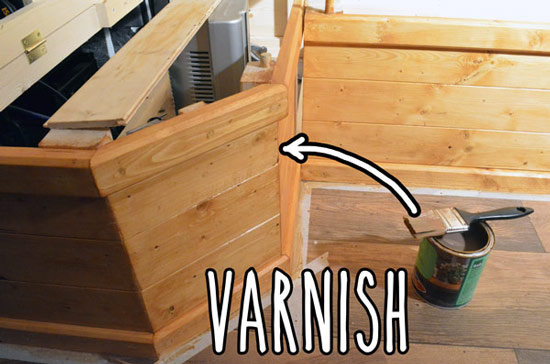
3. Varnish
I used two coats of a water-based varnish with a flat satin finish. This is when I learnt that a water-based varnish doesn’t bring out the natural grain of the wood. I’m glad I learnt this before I did the finish on the cladding walls.
Learnings:
- lap joints are no stronger than simple butt joints unless you have the right tools to do them right
- water based varnish is crap if you like to actually see the grain of the wood
- a router is something I don’t think is absolutely necessary but it gets used a lot if you have one
- next time I don’t think I’ll use such heavy duty slats. What do I mean next time anyway?…