function updateHeaderHeight() {
        // Get the height of #brx-header
        const headerHeight = document.querySelector('#brx-header').offsetHeight;
          
        // Store the height in the CSS custom property --header-height
        document.documentElement.style.setProperty('--brxw-header-height', headerHeight + 'px');
    }

    // Execute the function as soon as the document is ready
    document.addEventListener('DOMContentLoaded', function() {
        updateHeaderHeight();  // Initial update of header height when the document is ready

        // Update the header height on window resize and orientation change
        window.addEventListener('resize', updateHeaderHeight);
        window.addEventListener('orientationchange', updateHeaderHeight);
});

Cladding the side door

Mike Hudson โ€“ author of this post

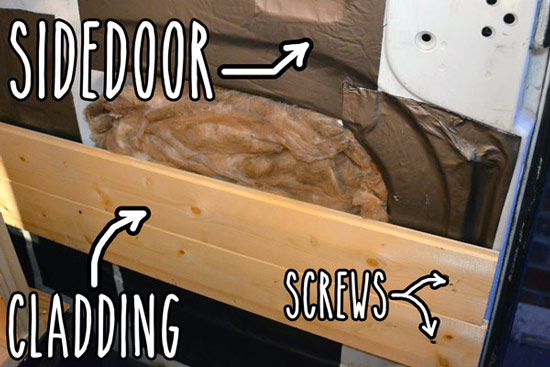
After cladding the walls and ceiling (see post) I went and did the side door.

Note: This post is backdated. Added 15th May 2015

1. Fit cladding to door

I screwed the cladding straight into the metal of the door making sure that each piece lines up with the cladding on the wall so the panels continue nicely when the door is shut.

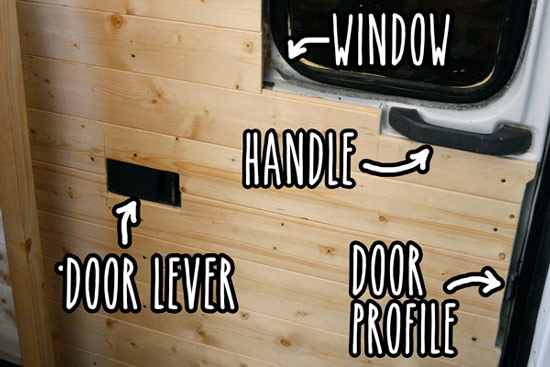
I used a utility knife and sandpaper to fit the edge profile of the door, and to cut around things like the door handle, lever and window.

Cladding the side door
Fitting cladding around things on door

2. Fit cladding around window

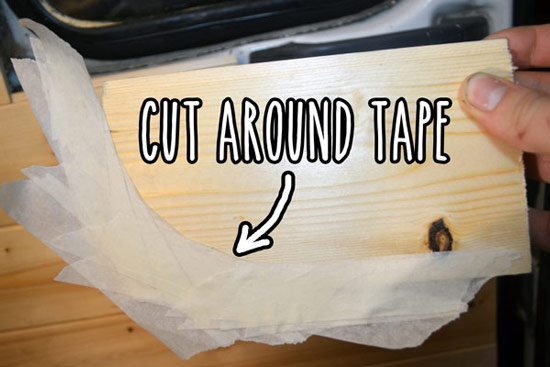
I found a neat trick for fitting the pieces around the corners of the windows. I built up around the corner with bits of masking tape ย and then removed the tape as one piece to use as a stencil to cut the curve for the piece of wood in the corner.

Creating template for curve
Curve for around window
campervan-cladding-window-corner
Cladding around the side window corner


Thanks for sharing!
Comment below
guest
2 Comments
Most Voted
Newest Oldest
Inline Feedbacks
View all comments