

I noticed some rust on the chassis of my van.
The chassis takes the load of the whole van and provides strength and rigidity to the whole structure. I don’t want this to be compromised in any way.
So in this post I’ll show you how I got it fixed. If you have anything similar on your van, maybe this will help, or give you an idea what’s involved. It was all fairly straightforward…
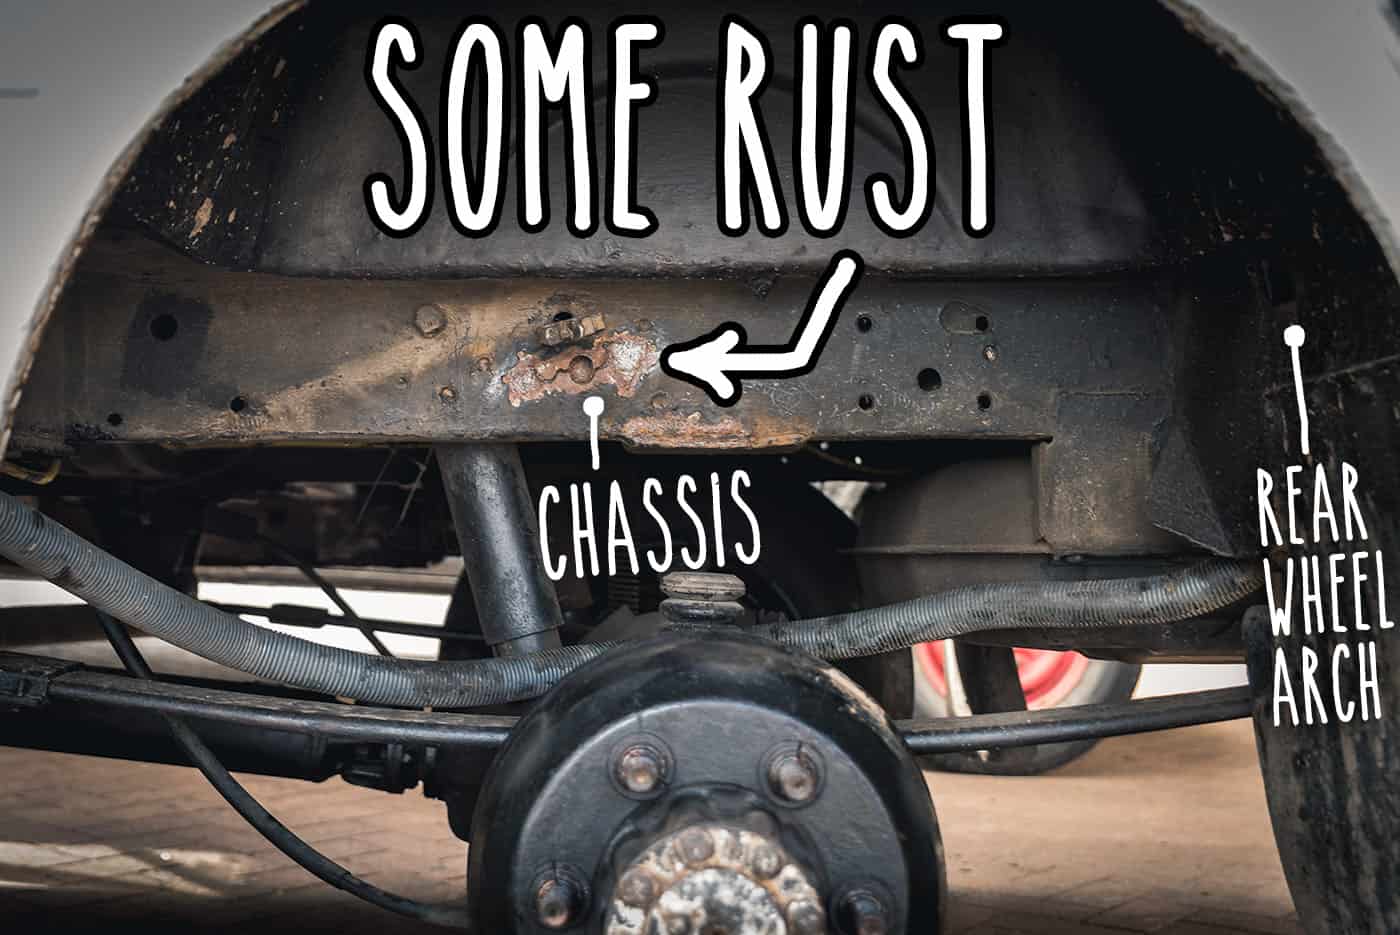
There’s some rust in here
It’s in a typical area for rust: a high water impact zone near the back wheels
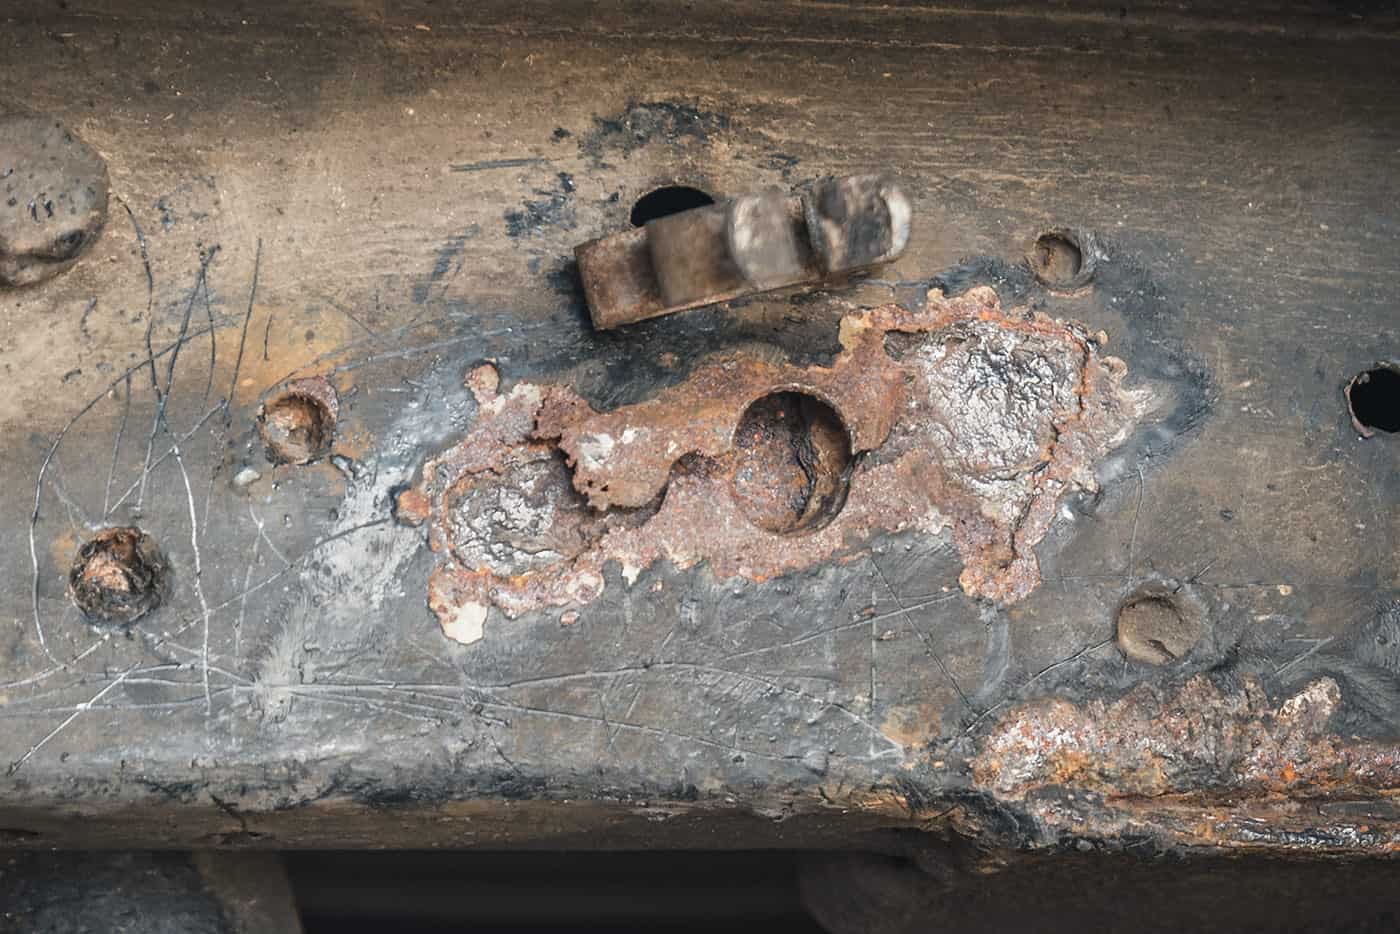
Here’s a closer look
I couldn’t figure out what was going on here. There seemed to be more than one layer of steel, or some internal reinforcement that had swelled and pushed the chassis box section outwards
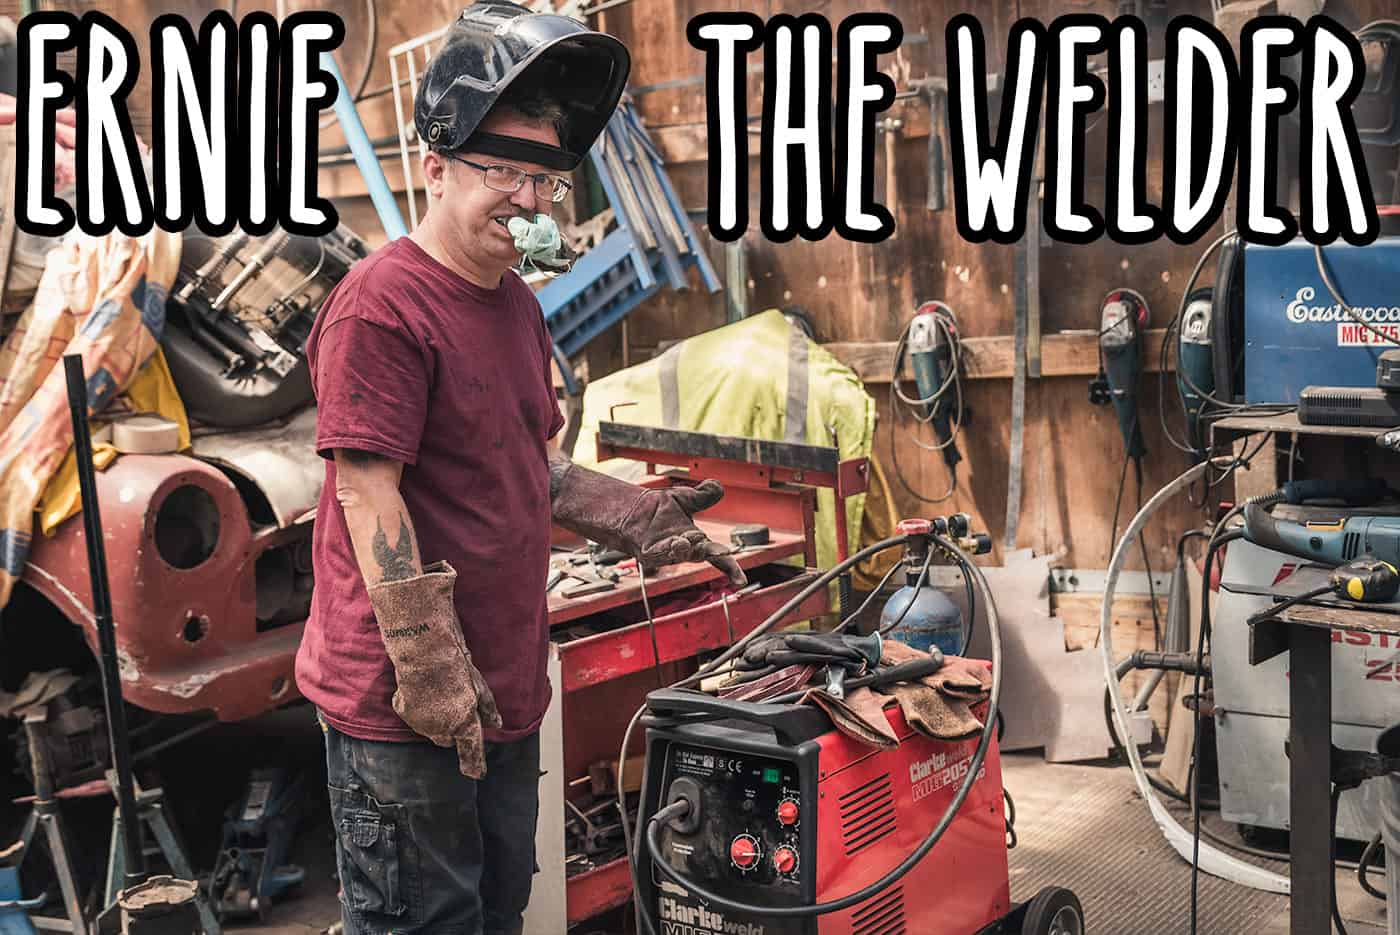
So I took it to this guy
See his website here: http://www.birminghamwelder.co.uk/
He cut out the bad metal
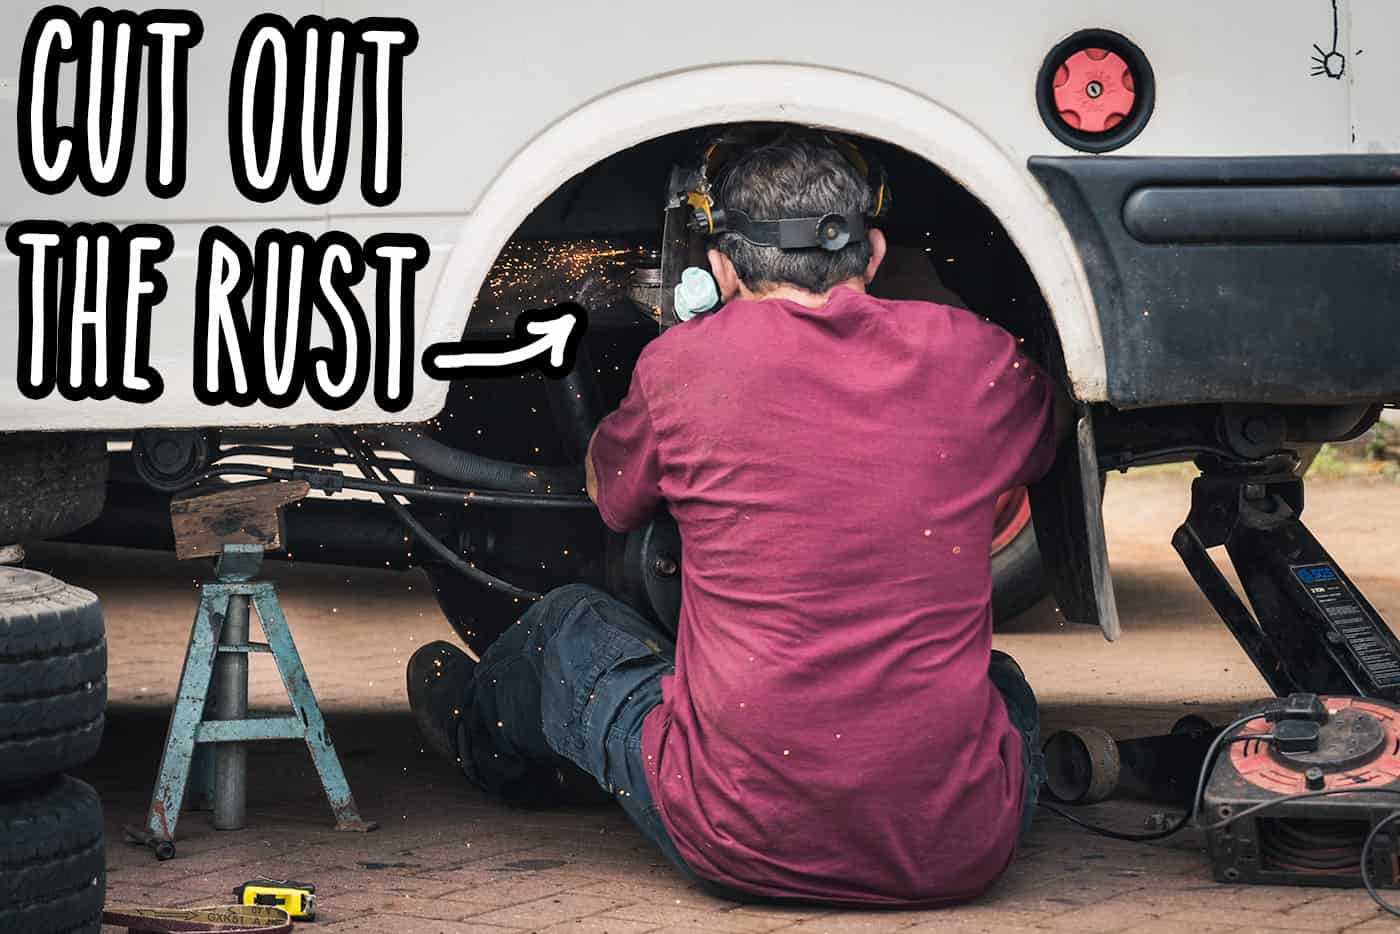
First he cut this out this much
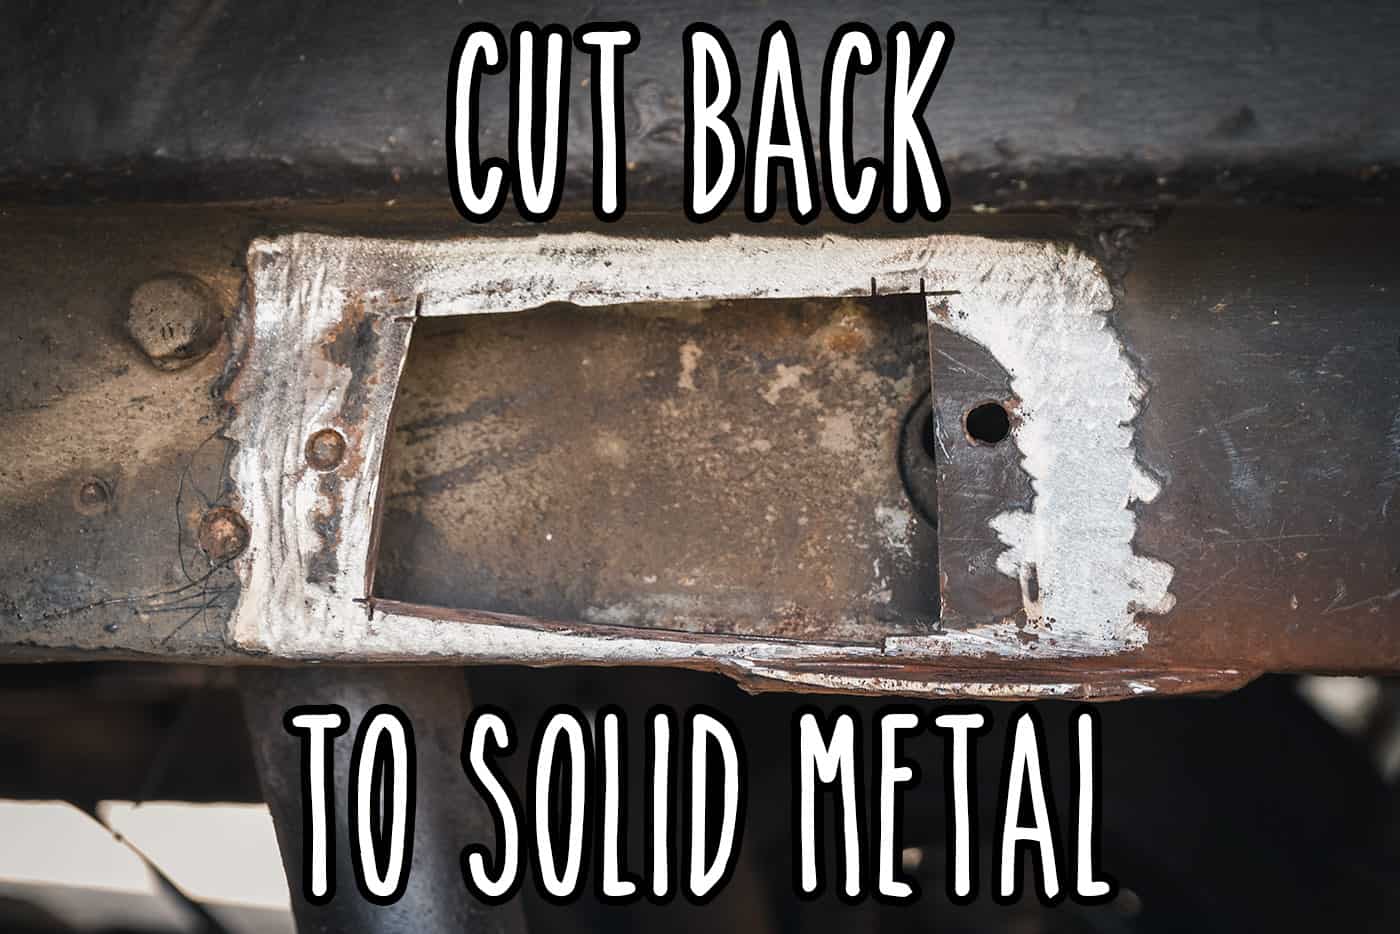
Here’s what came out
It looks like the steel around this section of the chassis has been doubled up. Maybe it’s for extra strength around the suspension damper fixing?
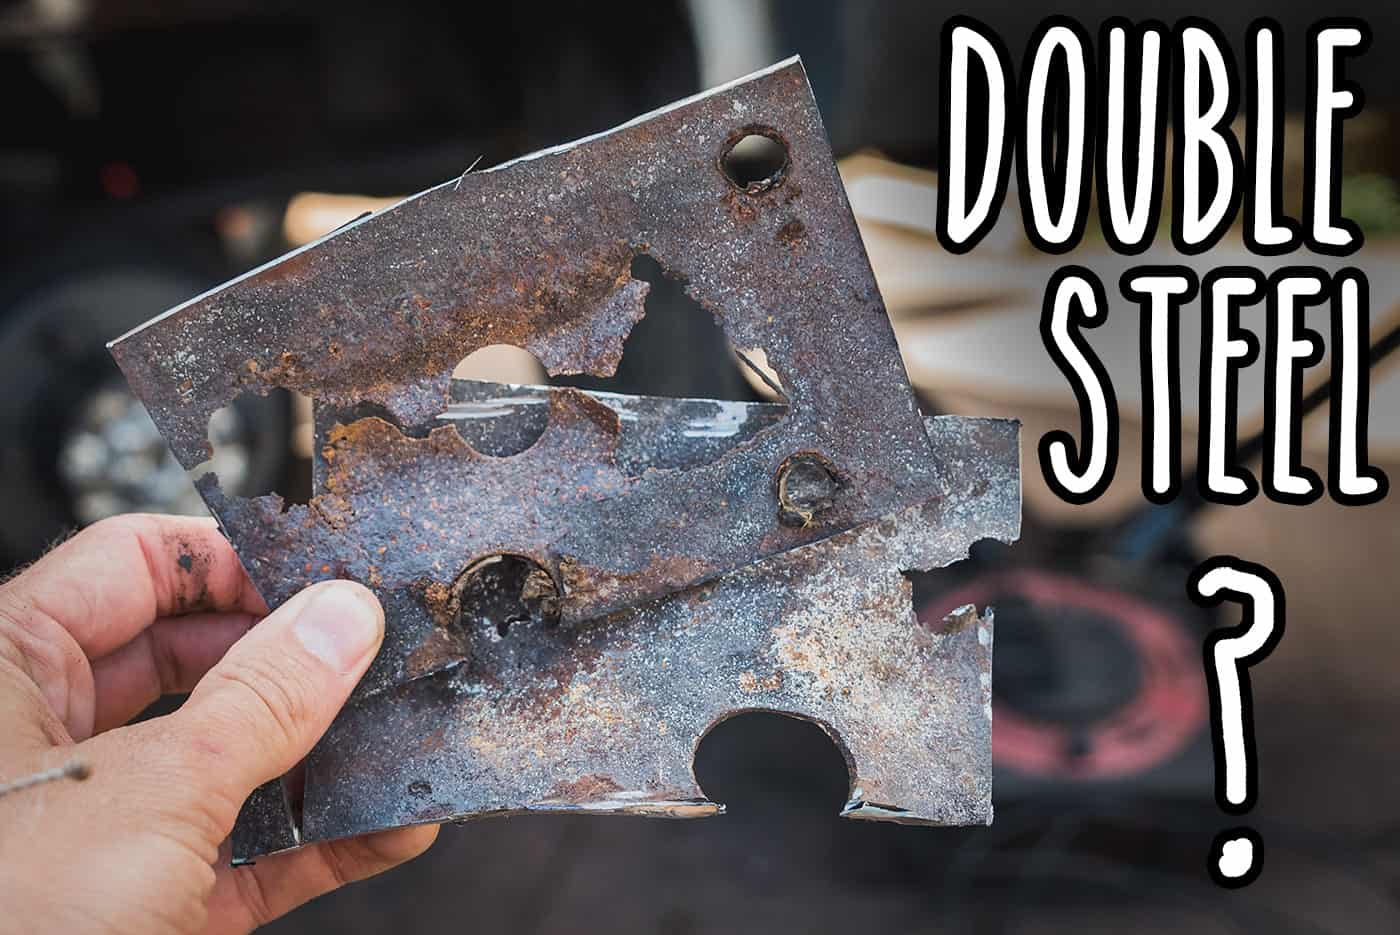
A closer look at what’s happened

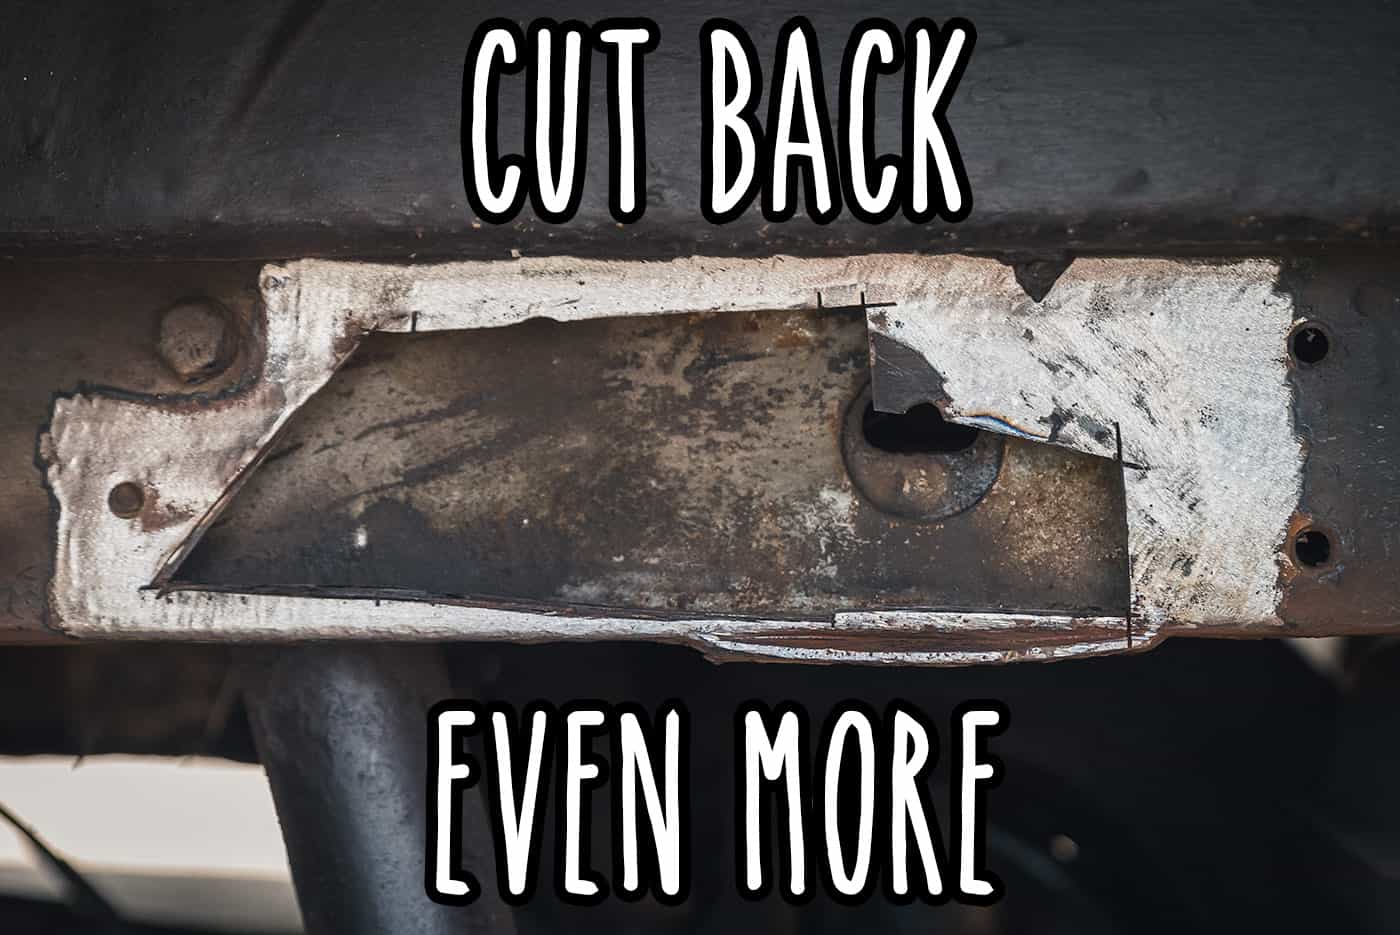
He cut back even further
Rust always spans way further than what’s visible on first inspection. I learnt that early on. Luckily the surrounding chassis is actually very solid with very little rust
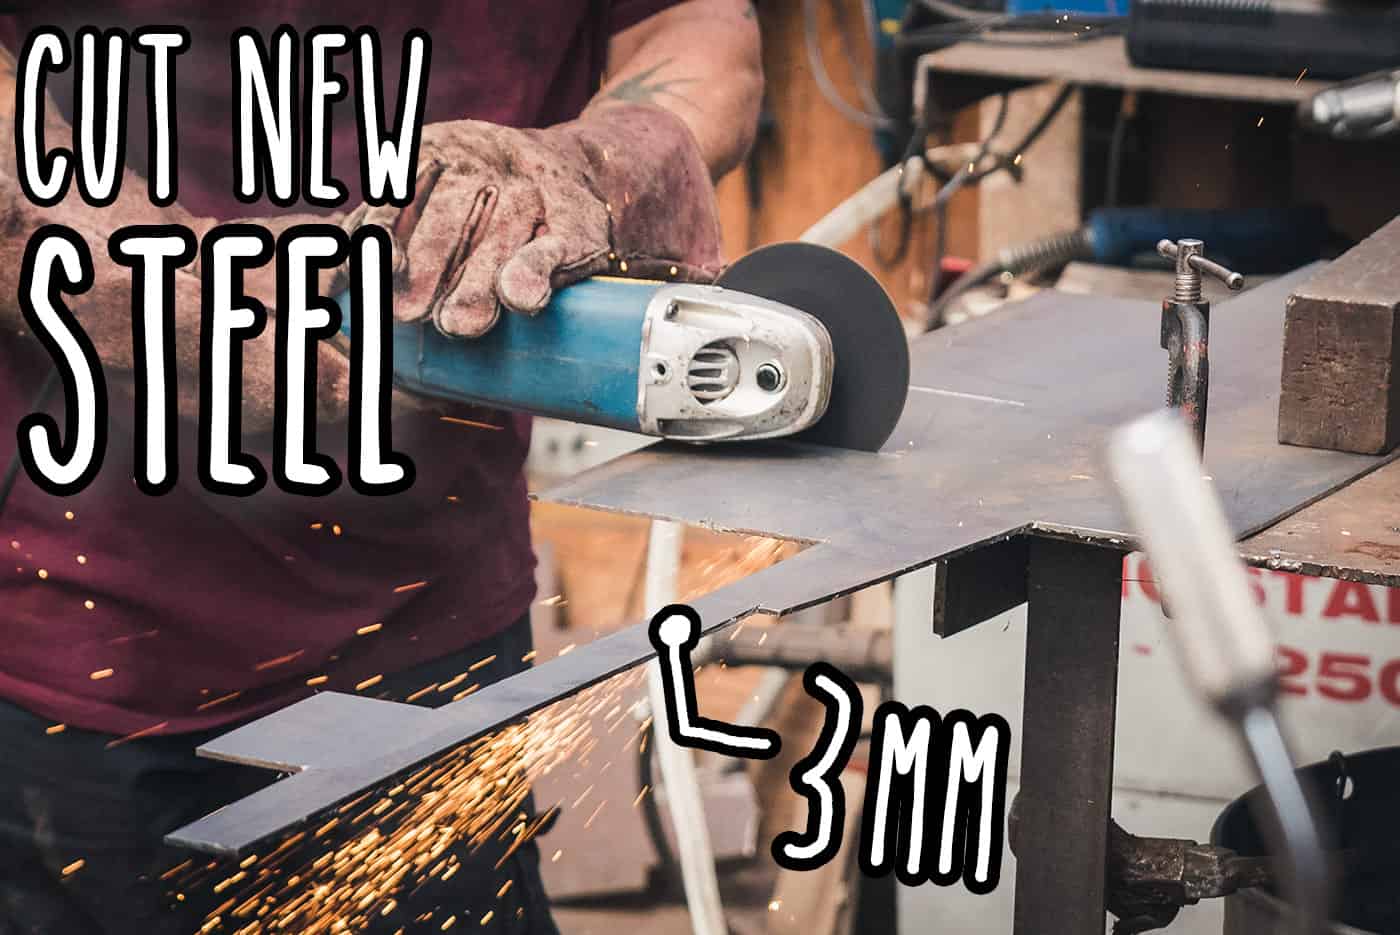
And cut out some new steel
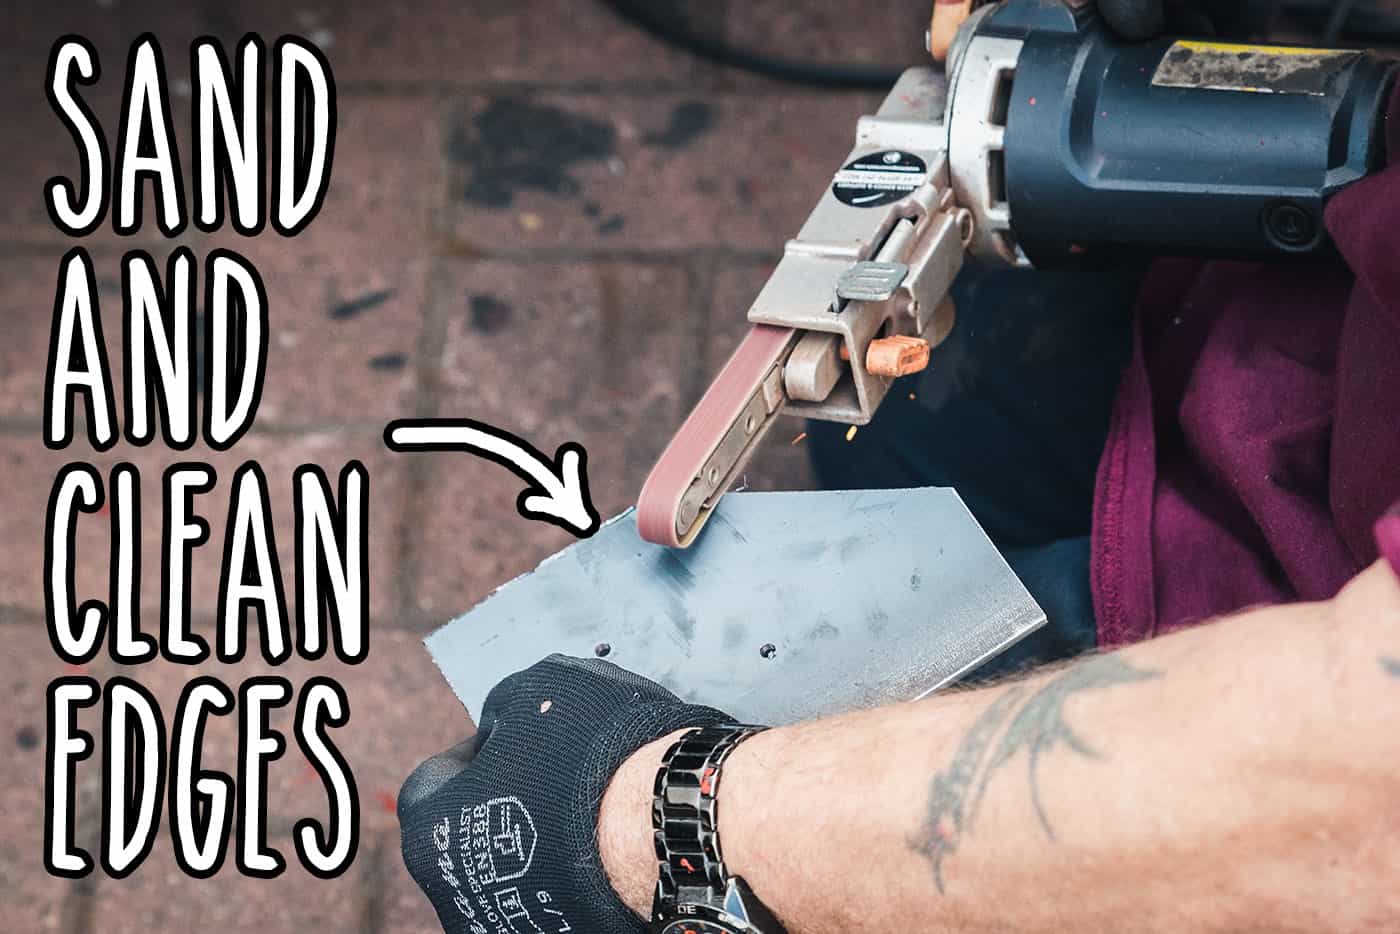
Sand and clean the edges
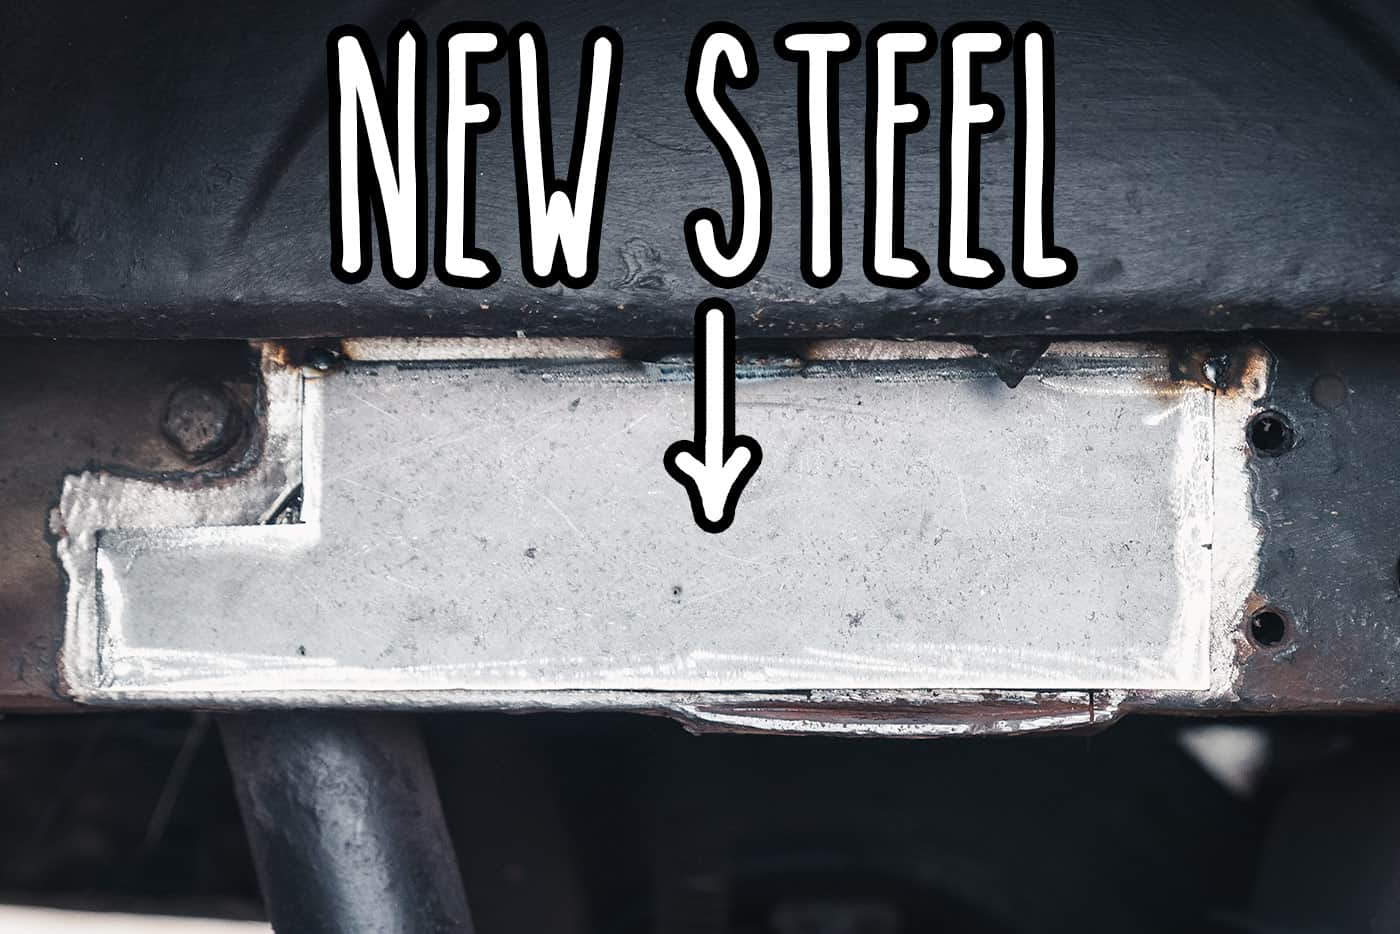
Here’s the new steel in place
Two 3mm steel plates were welded: One on the inside of the chassis and one on the outside – to maintain the original strength since the steel was doubled up here
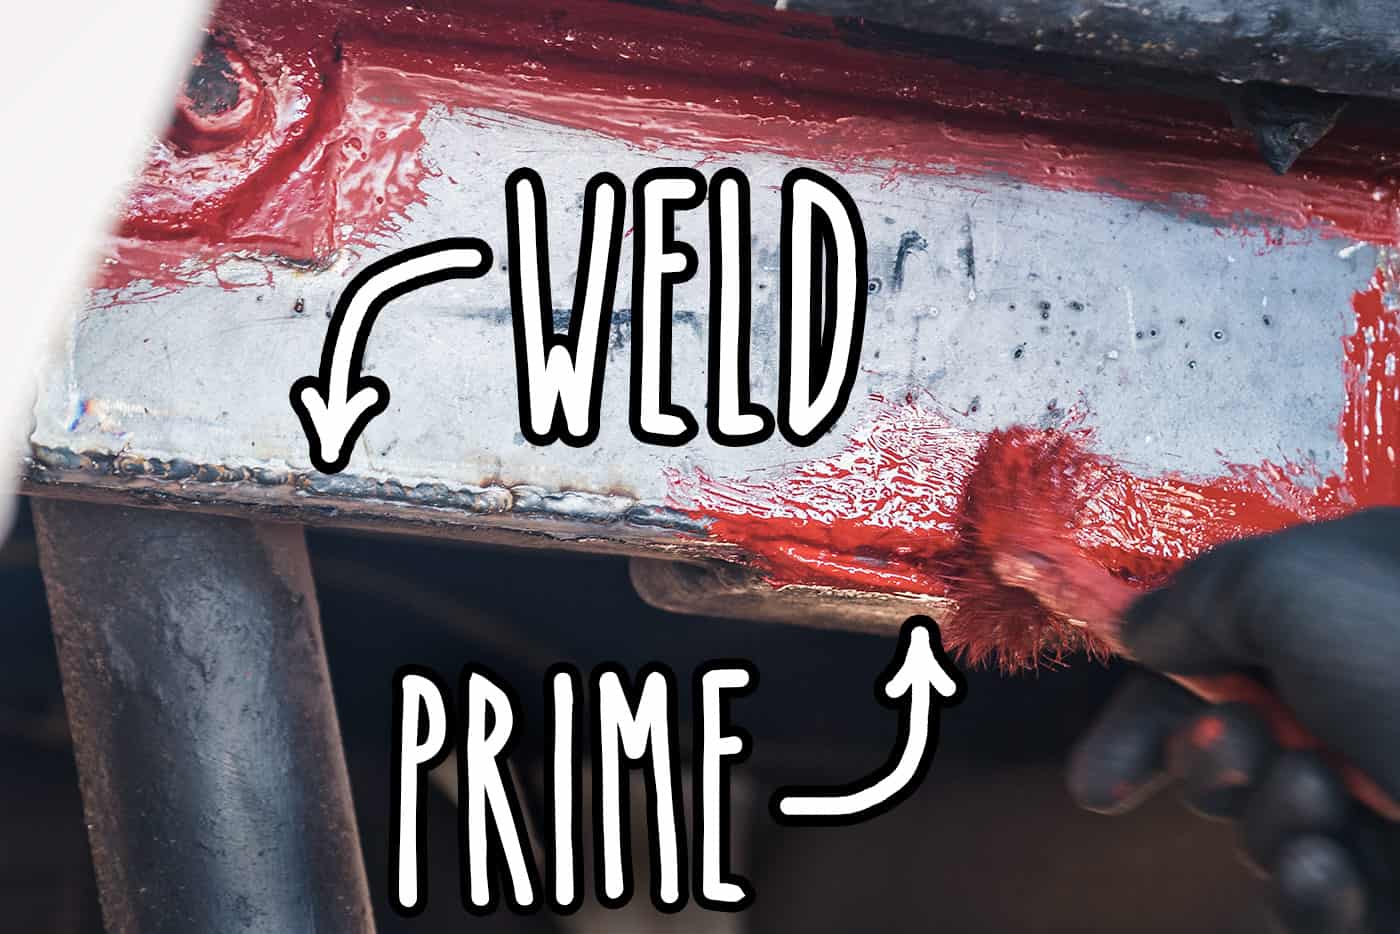
Weld and prime
That’s it
I decided to use Waxoyl straight over the primer, instead of paint. Paint cracks and flakes; Waxoyl sticks and repels water. I also sprayed Waxoyl on the inside of the chassis with an air compressor and Shutz gun so there’s some protection from the inside of the chassis
The cost
The work took about 2 and half hours and cost £95. Ernie gives a 12 month guarantee with all his work. He takes his time and also gave my whole van a good check over.
Have you had welding done on your van? if you have any advice, tips or recommendations for welders, please comment below :-)