


My LDV Convoy van is very noisy! Any speed over 20MPH and the sound system becomes useless. If a sound meter is anything to go by, I measured 82dB whilst idling sat in the driving seat and well over 90dB on main roads. An idling bulldozer is around 85db and loud enough to cause hearing damage after 8 hours of continuous exposure.
How do I soundproof a van?
Sound and noise is generated in a few different ways. Rather than using a lot of one material, you have to do a few things, using a few different types of material, depending on how the sound is transmitted. Here are the three main ways to stop transmission of noise:
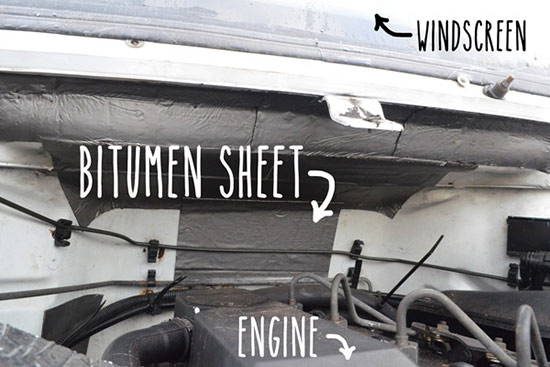
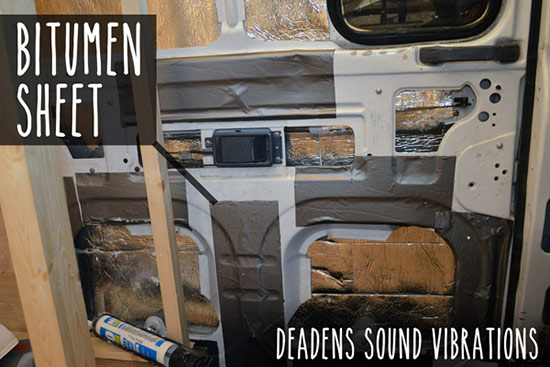
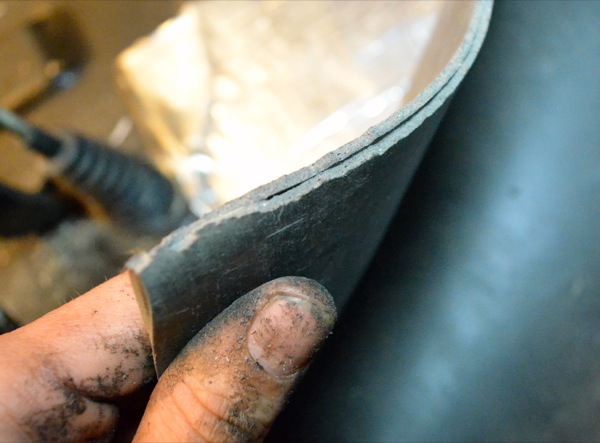
- Stop panels from resonating using a bitumen sheet (also known as roof flashing–this stuff). This is basically the same material as the branded sound deadening products but much cheaper. I used this in the engine bay, cab floor and foot well. It works incredibly well.
- Block sound using a mass loaded vinyl (also known as MLV). This stuff is very dense and is used to add mass to walls of building to act as a sound barrier and insulation. It does a great job of blocking sound. I used this on wheel arches, floor, the foot wells and the divide between the cab and engine bay.
- Absorb air-borne sound using an open cell foam and auto carpet. The foam can go pretty much anywhere in the cab and engine bay and mainly only absorbs the high frequencies. The auto carpet is good for anywhere inside the van, like on the floor and wheel arches.
This makes sense to me. Its not about using loads of one material. You have to do a few things using a few different materials depending on how the sound is generated and transmitted.
Materials used:
| Quantity | Item | Description | Cost | Supplier |
| 3 | bitumen flashing sheet | This is exactly the same material as the pro sound deadening stuff | £18.13 | Amazon and and Wickes |
| 2 | mass loaded vinyl sheet | supplied as 2 lots of 900 x 600mm sheets | £21.98 | Ebay (sound-deadening-shop) |
| 1 | felt backed sound proof carpet | 5FTX8FT6 10mm thick | £24.99 | Ebay (autobahnbarry) |
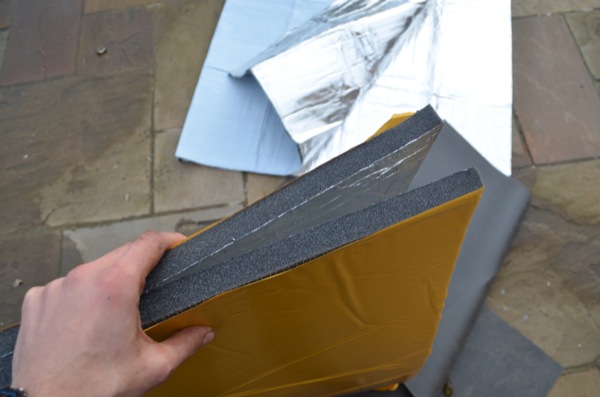
| 1 | 20mm open cell foam | I used this under the bonnet and inside of dash | £29.99 | Ebay |
| 1 | spray adheisive | The cheaper stuff is just as good | £4 | Amazon and Boyes |
I think the method I’m about to show you will have the most effect at reducing noise whilst driving, everything else will probably be marginal. Here is what I did…

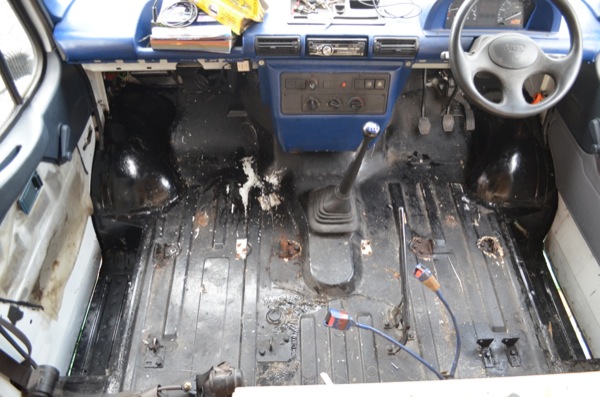
Prepare vehicle for the soundproofing
I removed everything from the cab to expose the bare metal floor. Any rust or corrosion on the floor should be fixed at this point, and before the next step.
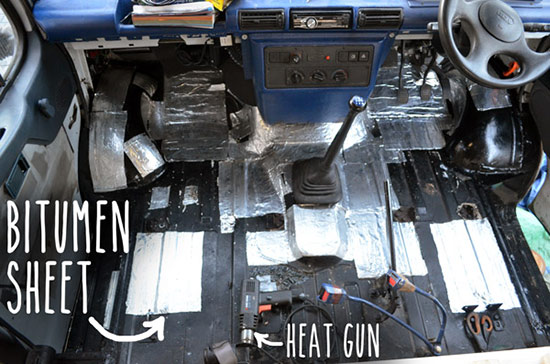
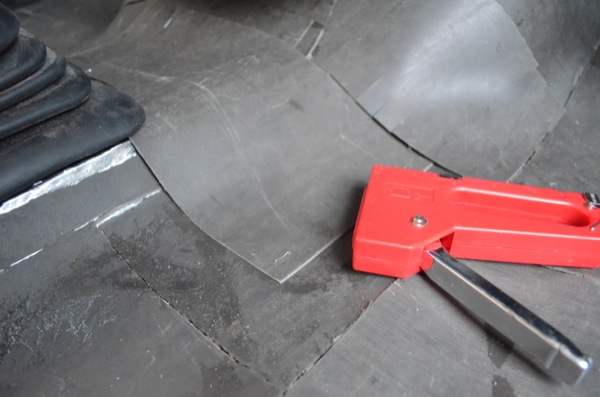
1. Stick down bitumen on doors, floor and engine bay
To use this in the most efficient way possible you just need to stick it to the areas that have the most potential to vibrate and resonate. There’s no need to cover the whole floor.
I tapped around the floor with a screwdriver and stuck down a square of bitumen in the area that had a drumming sound. This noticeably deadens the sound straight away–the panel will sound like a dull knock when it is tapped, rather than a more sustained boom.
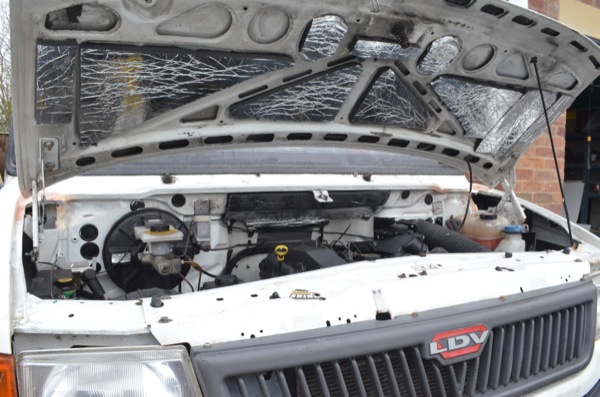
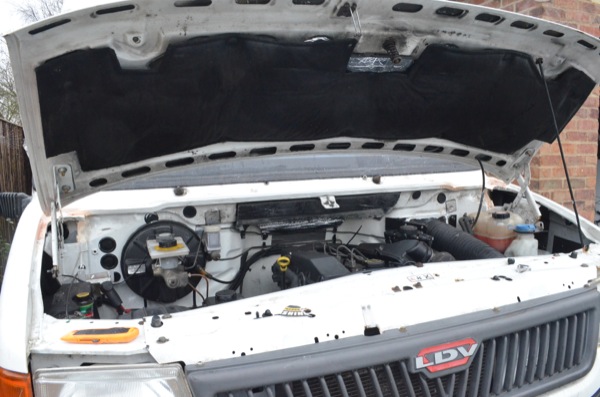
If the temperature is very cold then you may need to heat the bitumen sheet slightly to make it tacky so it is in full contact with the metal. I applied the bitumen sheet to the cab floor, the inside of the engine bay and on the inside of the door and body panels. See images below.
2. Cover the floor and wheel arches with mass loaded vinyl (MLV)
Now the mass loaded vinyl (MLV) goes down. I used two layers on over the gearbox, at the front of the foot wells and over the wheel arches where there is the most noise from the engine.


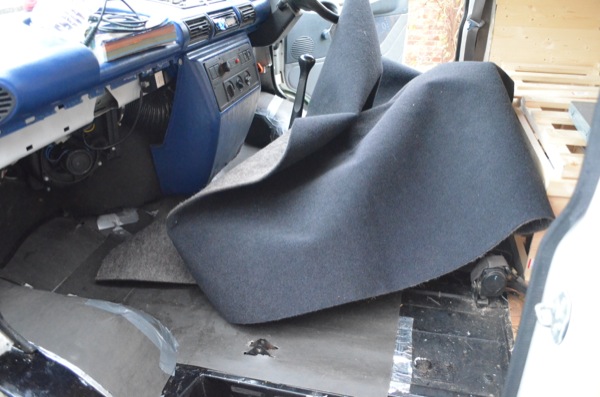
3. Lay carpet on floor and wheel arches


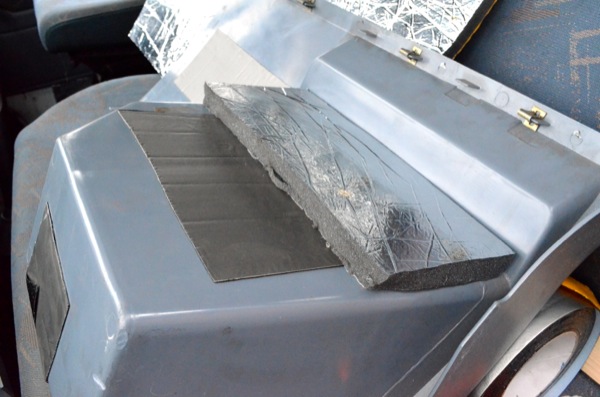
4. 20mm foam under bonnet and on the inside of the dashboard

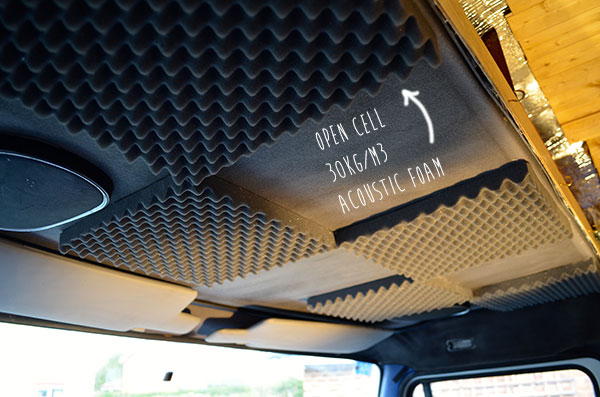
Update: I added some acoustic foam
I found some studio grade acoustic foam on Amazon so I thought I’d stick some on the roof of the cab since it is made out of hard plastic and quite reverberant. This is only really going to dampen airborne sound in the mid to high frequency range. I’m not sure if it works but hey, it looks good and its worth a shot for the cost of 5 tiles.
Results!
The difference is huge. It now measures 72db when idling which is 10db less than without the soundproofing! excellent results. The sound from the stereo has also dramatically improved which is something i didn’t even think about.
… and to wrap up in a few bullet points:
- if I had the money I’d have multiplied the amount of materials by 3 but there’s a point where any more will have a very marginal effect.
- you don’t need to go for the top branded sound proofing materials. Just get the basic generic material – its the same thing!
- Laying carpet with spray glue on uneven floors doesn’t give pro results but certainly does the job