


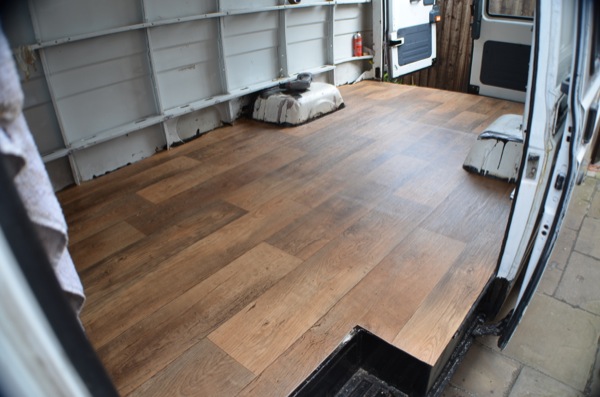
Once all the rust had been fixed up (see post) I put the wooden boards back down (already fitted in the van) and laid down some wood effect vinyl flooring.
Note: updated on 15th May 2015
Here’s how I put down the floor in my van conversion:
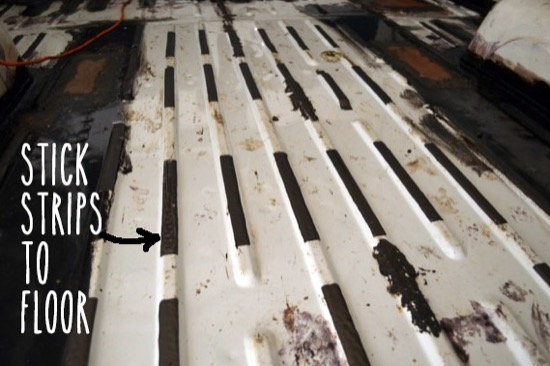
1. Prepare floor
Before putting the plywood boards back down (after removing rust on the metal underneath–see here) I laid some strips of bitumen flashing onto the metal ribs of the van floor. The idea was to minimise vibrations coming up through the floor when driving. This was probably not really necessary but the van was very loud at this point and I was trying to do everything I could to make it quieter.
2. Glue down the plywood floor
I started with the middle section since the other two boards sit on top the lip of this one. I put some dabs of glue and put some weights on top to stick the board down. It’s important that this surface is completely flat for the vinyl.

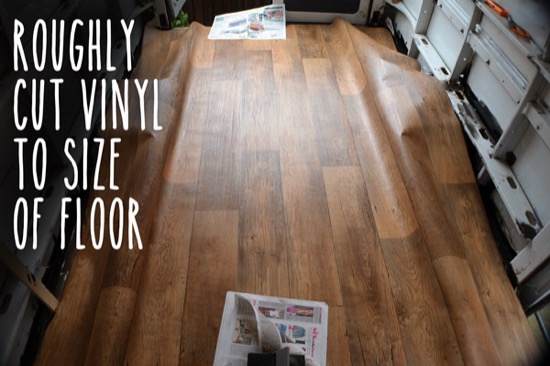
3. Lay down vinyl and cut to area
The vinyl should line up with the lines of the wood effect parallel with the van walls and be roughly cut to the area of the floor. I didn’t have to do this because mine was already the right size, which saved a bit of messing about.
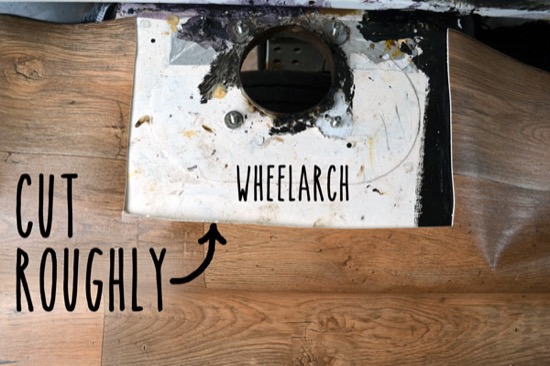
4. Cut roughly round wheel arches
I started by roughly cutting the vinyl around the wheel arches–just a rough square shape, leaving a good few cm extra.
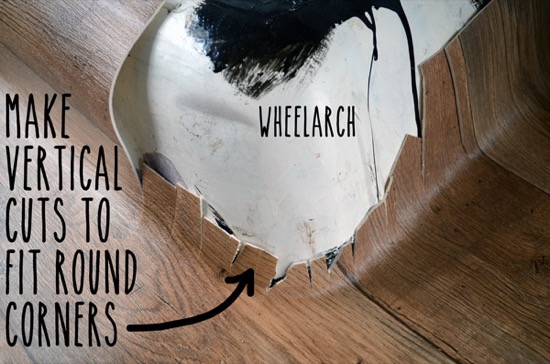
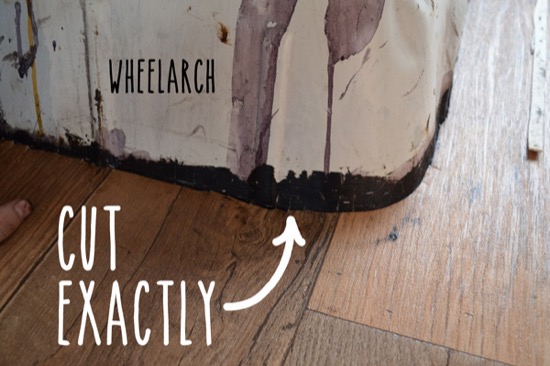
5. Cut around wheel arch corners
To fit around the corners of the wheel arch I made several vertical cuts into the vinyl. I kept adding more cuts until the vinyl sits right down onto the floor. I noticed that the vinyl easily tears once a cut has been made so you have to be gentle and not force it into the corner.
After the vertical cuts I carefully cut (with a new blade to get a nice clean cut) the vinyl around the corner wheel arch making sure the vinyl was flat to the floor.
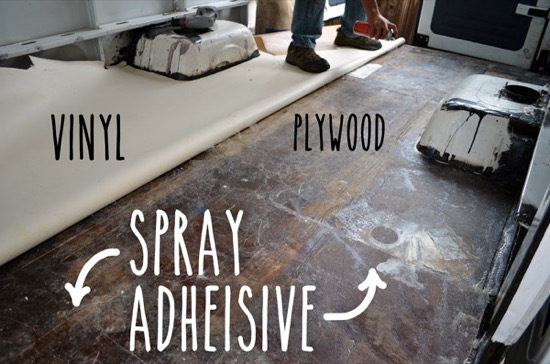
6. Stick it down
Once everything had been cut and fitted. I used a spray adhesive to fix it down. It took two cans to cover the floor. I made sure that the vinyl was completely flat without any air bubbles by pushing outwards from the middle with my hands.
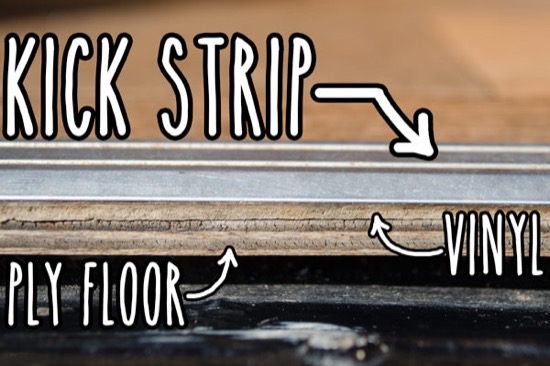
7. Finish edges
I finished the edge of the vinyl around the side door entrance with some aluminium kick strip. This keeps the vinyl from peeling away at the edge and also protects the edge of plywood floor as you come in and out of the van.
I’m now ready to fit the frame for the walls and ceiling