function updateHeaderHeight() {
        // Get the height of #brx-header
        const headerHeight = document.querySelector('#brx-header').offsetHeight;
          
        // Store the height in the CSS custom property --header-height
        document.documentElement.style.setProperty('--brxw-header-height', headerHeight + 'px');
    }

    // Execute the function as soon as the document is ready
    document.addEventListener('DOMContentLoaded', function() {
        updateHeaderHeight();  // Initial update of header height when the document is ready

        // Update the header height on window resize and orientation change
        window.addEventListener('resize', updateHeaderHeight);
        window.addEventListener('orientationchange', updateHeaderHeight);
});

Campervan Water System: Fresh & Grey Water Tank Installation

Mike Hudson – author of this post

This post details how I got running water in my campervan conversion…

I did separate posts on the shower and hot water and also mounting the shurflo water pump so this post will cover the rest of the water related stuff:

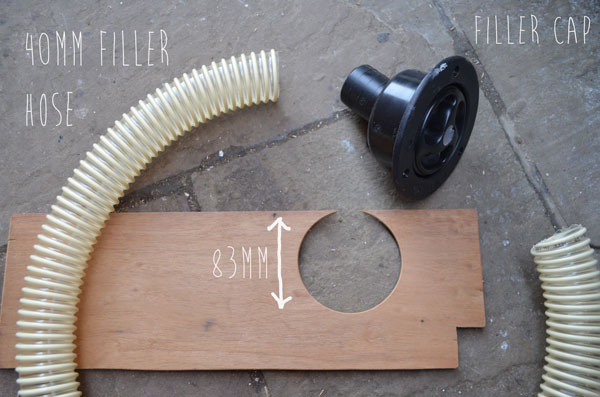
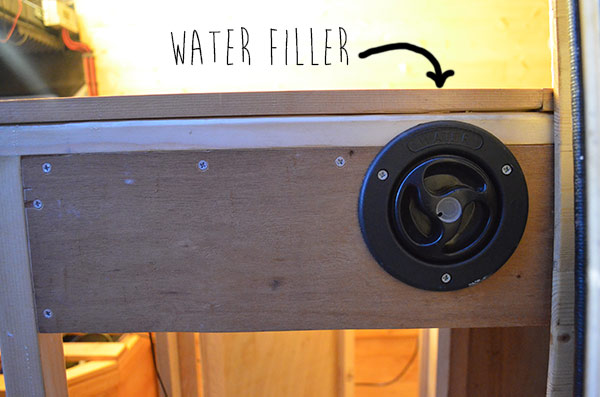
  • fresh water tank and filler inlet
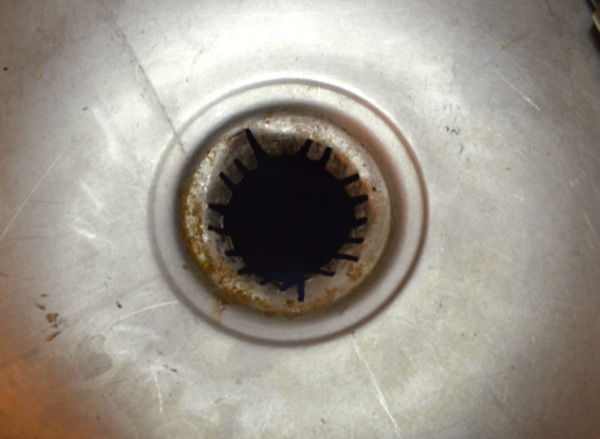
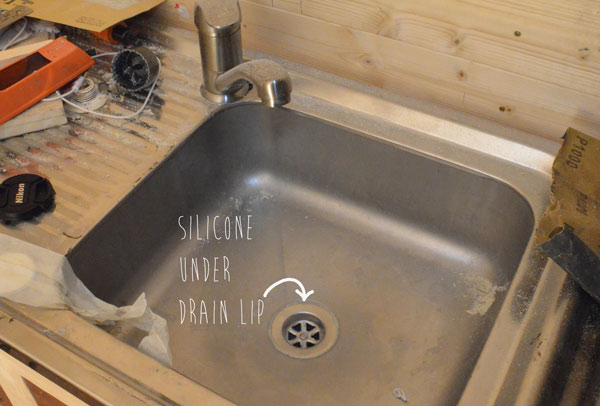
  • sink and drain
  • grey waste tank
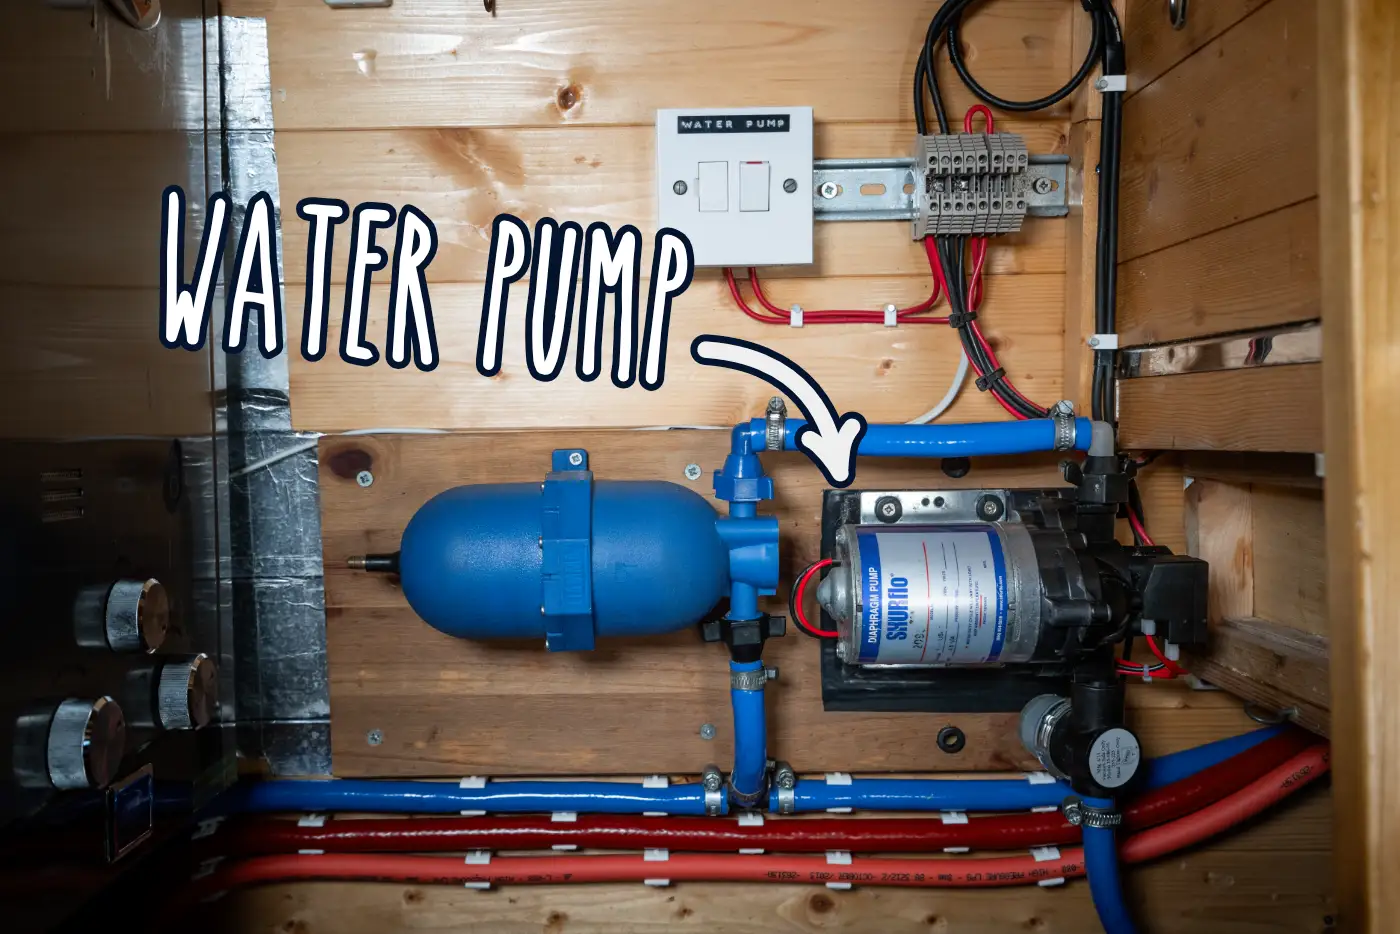
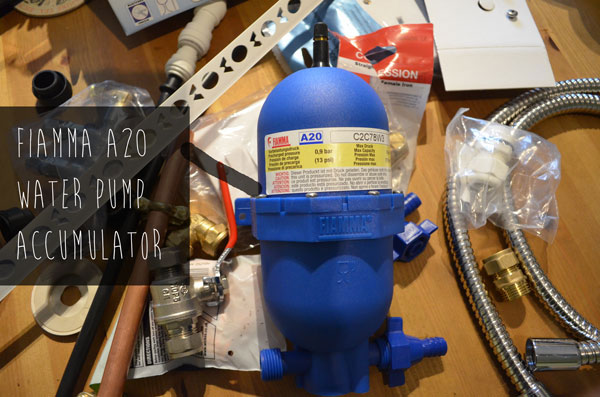
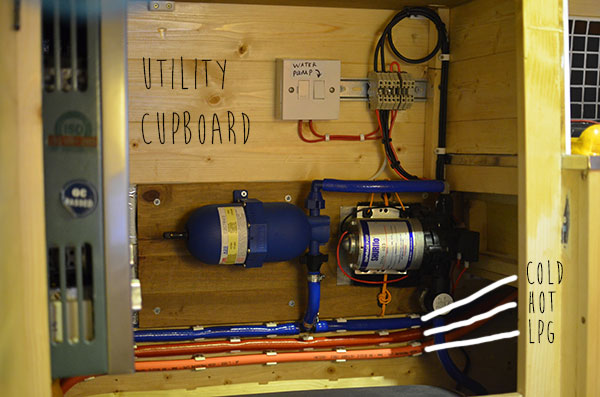
  • water pump and accumulator (shown in image below)
DIY campervan water system installation showing water pump, accumulator, wiring, pipework and water heater

[expand title=”Show list of materials”] This work was completed over quite a few weeks so apologies for the widely varied supplier list but hopefully it helps people who are trying to find out what all the little bits are [table id=7 /][/expand]
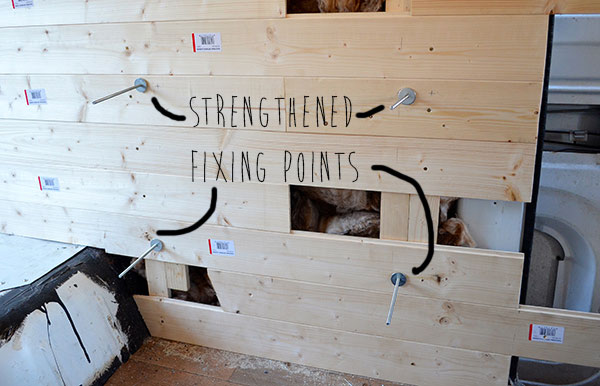
The water tank

The fresh tank was the first thing I put in the van and everything else was build around it, in a make it up as I go along kind of fashion. I used a common Fiamma 70 Litre fresh water tank (for on-board use) from… you guessed it, Amazon (the cheapest I found online was £58 here but most big caravan shops stock them – Magnum and O’leary).
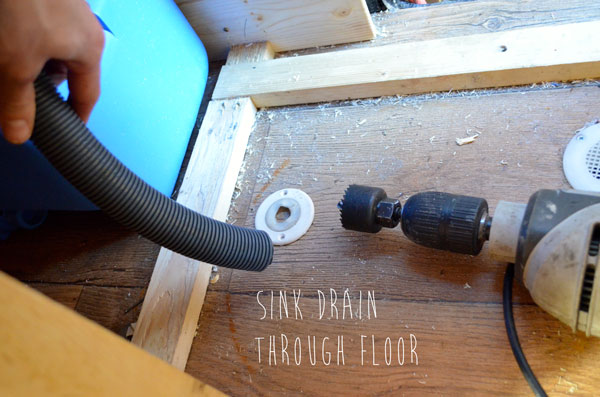
70L fresh water tank for campervan build
The water system started with a 70L Fiamma fresh tank. I decided to mount this in (probably) an unconventional way, standing on end.
fresh water tank outlet connection
The tank provides several points for the 20mm water outlet. I decided to go for a third of the way up. I could have done it right at the bottom but I got a little worried that the full tank would siphon off in the case of a leak.
Fitting the fresh water tank to the wall of campervan using strengthened fixing points
I pulled away some of the cladding and added some strengthening lengths of wood to fix the 4 mounting bolts to.
mounted fiamma water tank in vertical position inside campervan conversion
This whole tank will be concealed under the sink/hob unit and the outlet elbow will go straight to the water pump via 12mm semi-rigid hose
water filler hose and cap fittings
The tank will be filled using the filler cap on the back of the kitchen unit and easily accessed via the side door. The hose is 40mm food grade ‘filler hose’ which fits the filler cap neck nicely but needs a good tie wrap or two for a good fit on the water tank inlet.
campervan water filler cap location
This is stood looking into the van with the side door open to expose the water filler. I prefer to have this inside the van instead of mounted on the outside of the van body

The sink and drain

The sink/hob unit is from a donor caravan. Matt built a custom frame for it to sit on while I did the cupboard doors. I covered this in the making the kitchen cupboards post.
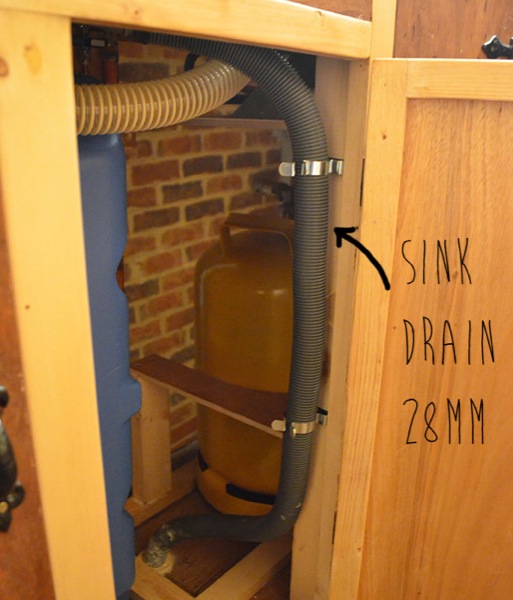
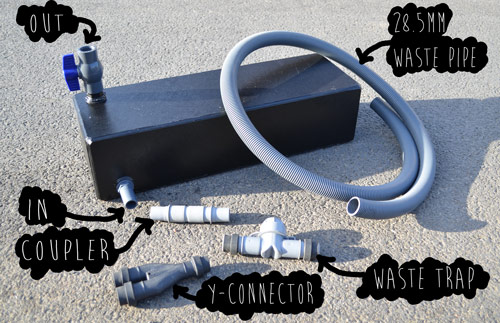
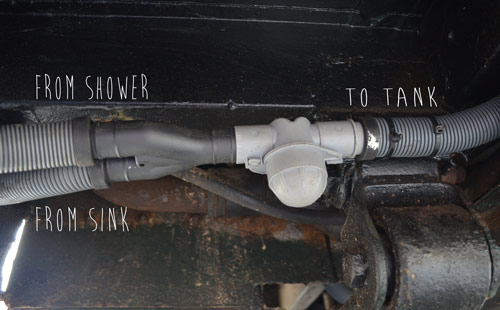
campervan sink drain hole
The hole was too small for the sink drain I had so I opened it up a bit with a cloth wrapped hacksaw blade.
campervan sink waste
Fits nice and flush. I even remembered to put a bead of silicone round the under side of the lip to ensure not leaks
campervan conversion tap hot cold connections under sink
I connected the red and blue 12mm semi rigid hose to the taps at this point. The tap is a normal domestic mixer tap which meant the hoses just needed a couple of jubilee clips to get a good seal.
campervan sink hot running water
I restricted the flow for hot water to minimum but its still more than enough!
campervan sink drain pipe 28mm
The drain comes straight down from the sink and down through the floor
28mm convoluted sink drain hose pipe. Hole about to be cut in floor
Straight through the floor where it will then combine with the shower waste via a Y-connector and through a waste trap before entering the grey waste tank
sink waste under van
I sealed all around the pipe with sikaflex 512 and also made a mess

Grey waste tank

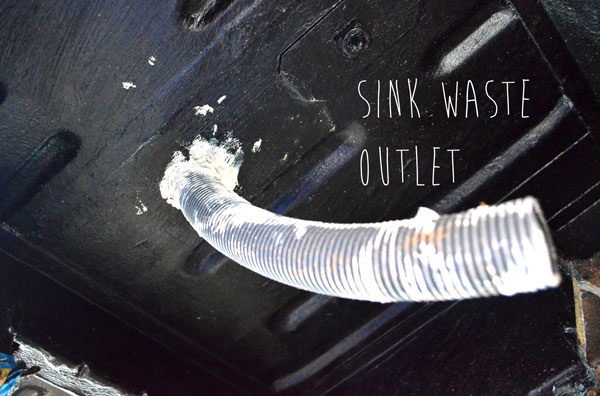
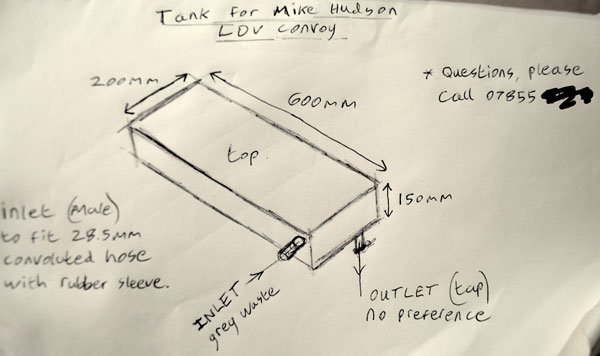
This tank will be used to collect drain water from the sink and shower. It’s not really essential but will be useful when parked up in cities or anywhere I’d like to remain a little inconspicuous. The tank will have to be custom made and will have an inlet (to fit 28.5mm waste pipe) and outlet consisting of a tap mounted directly on the underside of the tank for emptying. Most of the time though, I’ll probably just keep the drain tap open so the water runs through onto the floor and just close it when It is needed.

I decided 20L would be more than enough capacity to collect drain water since I’ll only be using small amounts of water at a time. I contacted Barratt tanks and emailed him over a sketch with my dimensions and rough location for inlet and outlet. He was the cheapest and most helpful person I found (I found him after a recommendation on the SMBCC forum)
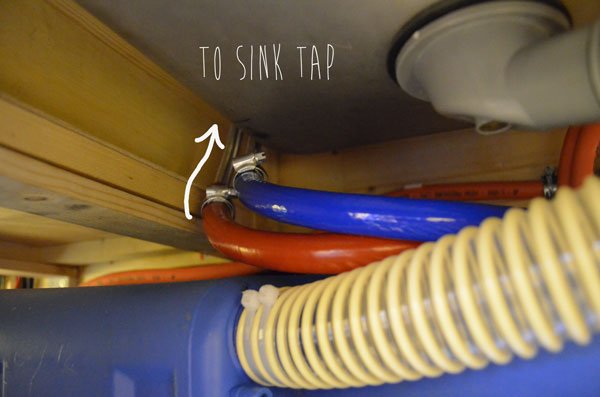
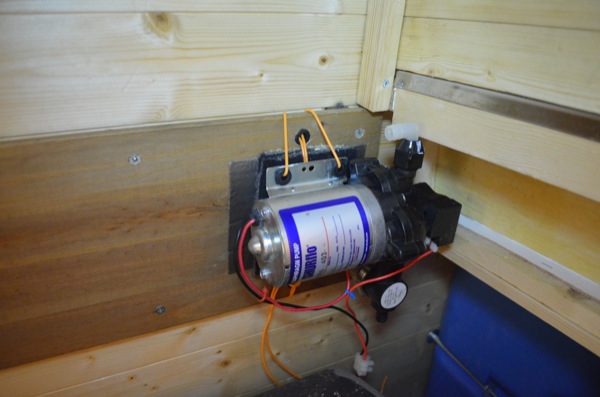
grey waste tank dimensions drawing
Here is a sketch of my tank. I sent this to Shaun at Barratt tanks.
campervan conversion grey water tank parts and connections
grey waste tank and connections
waste trap under the van
Y-connector goes straight into the trap and then into the tank via waste pipe

The pump

I’ll be using a 30psi Shurflo trail king 7. It seems like a great bit of kit – solid, heavy and sounds like it really knows what it’s doing. I did have some trouble with the noise at first but I solved it by hanging the pump rather than fixing it which I explain here – mounting the shurflo water pump. I fed the pump into an accumulator (Fiamma A20 from O’leary motorhomes) after some unsatisfactory bench (pulsating) tests with no accumulator. The difference is night and day and for £20 its an obvious choice to get the water running nicely.

shurflo water pump mounting
The pump is central to the proper functioning of the water system so I made sure It was a decent one. It is designed to be serviceable and spare parts readily available
fiamma water system accumulator
Since these pumps rely on pressure in the system to automatically turn off, they have a tendency to oscillate when the tap is not fully open. A ‘buffer’ is needed to dampen the system and to reduce and oscillatory behaviour – they call it an accumulator. In my opinion, these pumps should always be used with an accumulator and should also lengthen the life of the pumps micro-switch and diaphragm.
water system accumulator and pump in campervan
I decided to name this the ‘utility cupboard’. In here is the water heater, water accumulator, water pump, 12V terminals and fridge.

Hopefully this give you an idea of how you get install a running water system into your campervan conversion. Please leave any questions or comments below…

From van to home

Build a Van you'll Be Proud of

Everything you need to build your dream campervan — electrics, insulation, joinery, design and more.

Comment below
guest
33 Comments
Most Voted
Newest Oldest
Inline Feedbacks
View all comments
Thanks for sharing!